广西北海房价,英雄大作战技能,高潮流很多水的故事图片
介绍如何在linux下安装mysql 5.7.18
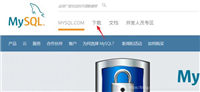
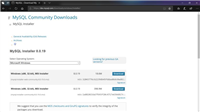
1、下载mysql:官网,点击downlosas,翻到网页底部,下载社区版,一路点下去,选择通用linux,下载64位那个,注意检查md5
值。

2、安装关键步骤,直接贴出命令
[cpp] view plain copy 在code上查看代码片派生到我的代码片
[root@centos mysql]# tar -xzvf mysql-5.7.17-linux-glibc2.5-x86_64.tar.gz -c /usr/local
[root@centos mysql]# cd /usr/local
[root@centos local]# mv mysql-5.7.17-linux-glibc2.5-x86_64 mysql
[root@centos local]# cd mysql
[root@centos mysql]# mkdir data
[root@centos mysql]# groupadd mysql
[root@centos mysql]# useradd -r -g mysql -s/bin/false mysql
[root@centos mysql]# chown -r mysql:mysql ./
[root@centos mysql]# bin/mysqld --initialize --user=mysql --basedir=/usr/local/mysql --datadir=/usr/local/mysql/data
2017-02-23t07:43:03.404885z 0 [warning] timestamp with implicit default value is deprecated. please use --explicit_defaults_for_timestamp server option (see documentation for more details).
2017-02-

23t07:43:04.442174z 0 [warning] innodb: new log files created, lsn=45790
2017-02-23t07:43:04.588507z 0 [warning] innodb: creating foreign key constraint system tables.
2017-02-23t07:43:04.646721z 0 [warning] no

existing uuid has been found, so we assume that this is the first time that this server has been started. generating a new uuid: b5c8e226-f99b-11e6-beb5-b7c1a1e39029.
2017-02-23t07:43:04.671492z 0 [warning]

gtid table is not ready to be used. table 'mysql.gtid_executed' cannot be opened.
2017-02-23t07:43:04.672338z 1 [note] a temporary password is generated for root@localhost: i%e=s+lfx9ko
[root@centos mysql]#

bin/mysql_ssl_rsa_setup --datadir=/usr/local/mysql/data
generating a 2048 bit rsa private key
.....................................+++
..............................+++
writing new private key to 'ca-key.pem'
-----
generating a 2048 bit rsa private key
.........................................+++
.........................+++
writing new private key to 'server-key.pem'
-----
generating a 2048 bit rsa private key
..................................................+++
...................................................................................................................................................................................................+++
writing

new private key to 'client-key.pem'
-----
[root@centos mysql]# cd support-files
[root@centos support-files]# cp my-default.cnf /etc/my.cnf
[root@centos support-files]# gedit /etc/my.cnf
[root@centos support-files]# cp mysql.server /etc/init.d/mysqld
[root@centos support-files]# service mysqld start
starting mysql.logging to '/usr/local/mysql/data/centos.cn.err'.
. success!
[root@centos support-files]# ps aux |grep mysql
root  18279 0.0 0.0 11764 1576 pts/0 s 17:34 0:00 /bin/sh

/usr/local/mysql/bin/mysqld_safe --datadir=/usr/local/mysql/data --pid-file=/usr/local/mysql/data/centos.cn.pid
mysql  18449 1.9 9.5 1182688 177940 pts/0 sl 17:34 0:00 /usr/local/mysql/bin/mysqld --

basedir=/usr/local/mysql --datadir=/usr/local/mysql/data --plugin-dir=/usr/local/mysql/lib/plugin --user=mysql --log-error=/usr/local/mysql/data/centos.cn.err --pid-file=/usr/local/mysql/data/centos.cn.pid

--socket=/tmp/mysql.sock --port=3306

[root@centos support-files]#
一行一行解释:
把压缩包解压到/usr/local目录下,就是把mysql安装在该目录下。
切换到/usr/local,把刚才解压后的文件夹重命名为mysql。
在mysql目录下创建data文件夹,用来存储mysql的数据。
增加用户组mysql。
增加用户名mysql属于mysql组。
修改mysql目录的拥有者和组。
初始化mysql,分两步:
第一步,bin/mysqld 注意后面给的参数,之一部会产生一个临时密码,保存,后面登录数据库要用到;
第二步,bin/mysql_ssl_rsa_setup,看起来像是对数据库安全的处理,注意后面给的参数。
切换到support-files目录。
把my-default.cnf拷贝到 /etc/my.cnf,注意centos7自带了一个my.cnf文件,覆盖掉。
编辑该文件,只对18,19,20,22行修改,如下
把mysql.server文件拷贝到/etc/init.d/mysqld下,主要负责mysql的开机启动。
启动mysqld进程。
查询mysql进程。有两个: /mysql/bin/mysqld_safe、/mysql/bin/mysqld
3、后续配置:
登录mysql,修改临时密码:/usr/local/mysql/bin/mysql -u root -p 回车输入初始化时生成的临时密码,修改密码:
set password for 'root'@localhost=password('xxxxxx');
每次登录mysql客户端嫌输绝对路径麻烦,就建一个软连接:ln -s /usr/local/mysql/bin/mysql /usr/bin/mysql,这样也省去了配path路径的麻烦。
mysqld的开机启动,使用chkconfig命令
chkconfig --add mysqld #增加mysqld服务
chkconfig --list    #列出所有的系统服务
看一下是不是在所有等级都是打开状态,例如:
chkconfig --level 35 mysqld on
#设定mysqld在等级3和5为开机运行服务
以上就是本文的全部内容,希望对大家的学习有所帮助,也希望大家多多支持移动技术网。
如对本文有疑问,请在下面进行留言讨论,广大热心网友会与你互动!! 点击进行留言回复
小白安装登录mysql-8.0.19-winx64的教程图解(新手必看)
Navicat连接MySQL时报10060、1045错误及my.ini位置问题

网友评论