全城热恋粤语,越南版qq,欧锦赛赛程表
最近在装了64位win10系统的mac book笔记本上用mysql-installer-community-5.7.11.0安装mysql5.7.11,在配置mysql server时老是卡住,报错。(在别的pc相同windows系统,自动安装没问题),决定手动安装,依然问题多多,最后的成功安装案例如下:
一.准备安装软件
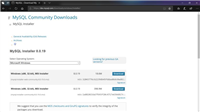
1.mysql.com下载mysql-5.7.11-win32.zip
2.mysql-workbench-community-6.3.6-win32.msi
3.vcredist_x64 (第2步需要安装microsoft visual c++ 2013 redistributable package)
二.安装mysql
1.解压mysql-5.7.11-win32.zip 到 c:\mysql-5.7.11-win32
2.设置环境变量 mysql_home=c:\mysql-5.7.11-win32, path=%mysql_home%\bin
3.关键一步是my.ini的设置,我的是
[winmysqladmin]
server="c:/mysql-5.7.11-win32/bin/mysqld.exe"
[client]
no-beep
# pipe
# socket=mysql
port=3306
[mysql]
default-character-set=utf8
# for advice on how to change settings please see
# http://dev.mysql.com/doc/refman/5.6/en/server-configuration-defaults.html
# *** do not edit this file. it's a template which will be copied to the
# *** default location during install, and will be replaced if you
# *** upgrade to a newer version of mysql.
[mysqld]
explicit_defaults_for_timestamp = true
# remove leading # and set to the amount of ram for the most important data
# cache in mysql. start at 70% of total ram for dedicated server, else 10%.
innodb_buffer_pool_size = 2g
# remove leading # to turn on a very important data integrity option: logging
# changes to the binary log between backups.
# log_bin
# these are commonly set, remove the # and set as required.
basedir="c:\mysql-5.7.11-win32\"
datadir="c:\mysql-5.7.11-win32\data\"
port=3306
server_id=1
general-log=0
general_log_file="mysql_general.log"
slow-query-log=1
slow_query_log_file="mysql_slow_query.log"
long_query_time=10
log-error="mysql_error_log.err"
default-storage-engine=innodb
max_connections=1024
query_cache_size=128m
key_buffer_size=128m
innodb_flush_log_at_trx_commit=1
innodb_thread_concurrency=128
innodb_autoextend_increment=128m
tmp_table_size=128m
# remove leading # to set options mainly useful for reporting servers.
# the server defaults are faster for transactions and fast selects.
# adjust sizes as needed, experiment to find the optimal values.
# join_buffer_size = 128m
# sort_buffer_size = 2m
# read_rnd_buffer_size = 2m
#sql_mode=no_engine_substitution,strict_trans_tables
sql-mode="strict_trans_tables,no_auto_create_user,no_engine_substitution"
character-set-server=utf8
innodb_flush_method=normal
4. 管理员身份进入cmd(以下都是)
5.mysqld --install mysql --defaults-file=c:\mysql-5.7.11-win32\my.ini 安装mysql服务
6.mysqld --initialize 这是生成data目录及初始化数据
7.在data目录mysql_error_log文件,找[note] a temporary password is generated for root@localhost: 5zc=7qe&eneg,“:”后面红色标识的三位便是初始密码
8.启动服务net start mysql 或在服务中启动
9.mysqld
10.新开cmd, mysql -uroot -p
输入初始密码连接进入mysql数据库后,修改密码如下:
set password=password('123456');
flush privileges;
退出再次登录,使用新密码就行了:
mysql -uroot -p123456
三、为方便操作安装workbench
1.先安装visual c++2013 redistributable package
2.安装workbench 32位
这两步没什么困难。
以上所述是小编给大家介绍的64位win10系统安装mysql5.7.11的方法,希望对大家有所帮助
如对本文有疑问,请在下面进行留言讨论,广大热心网友会与你互动!! 点击进行留言回复

小白安装登录mysql-8.0.19-winx64的教程图解(新手必看)
Navicat连接MySQL时报10060、1045错误及my.ini位置问题

网友评论