滁州采购,郑清心,指南针万能网络电视
一般情况下,aspnetcore发布后的默认端口是5000,这个大家都知道,而且默认骨架代码中没有看到任何让你输入的ip地址和端口号,但作为程序员的我们,不希望
被框架所管制,那如何实现默认端口的修改呢?
骨架代码:
    public class program
    {
        public static void main(string[] args)
        {
            createwebhostbuilder(args).build().run();
        }

        public static iwebhostbuilder createwebhostbuilder(string[] args) =>
            webhost.createdefaultbuilder(args)
                .usestartup<startup>();
    }
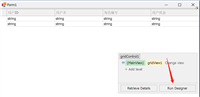
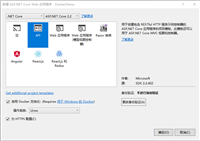
发布如下:

一:解决办法1(useurls)
骨架代码就那么几行,很容易在这个iwebhostbuilder中找到一个叫做useurls的方法,从注解中可以看得出来让webhost监听指定的端口号,截图如下:

那么答案就出来了,你需要自己来指定一下端口,改完之后截图如下:
    public class program
    {
        public static void main(string[] args)
        {
            createwebhostbuilder(args).build().run();
        }

        public static iwebhostbuilder createwebhostbuilder(string[] args) =>
            webhost.createdefaultbuilder(args)
                   .useurls("http://*:8080")
                .usestartup<startup>();
    }

但是在发布之后,你突然发现,卧槽,端口冲突了,我想换端口,tmd我还得为此再发一次程序,一个字麻烦,说一送一。差点被砍到的第一反应就是把硬编码
送到配置文件中。
二:解决办法2 (host.json)
你会突然发现要使用到的configuration属性只能在startup类中,毕竟在webhost的build之前servicecollection都没有初始化,哪里有统一化的配置系统呢,
那怎么办,还能怎么办,自己定义一个configuration了,然后修改的步骤如下:
1. 新增一个host.json,名字随便定义,自己看得懂就行啦。
{
    "url": "http://www.lhsxpumps.com/_*:9099"
}

2. webhost代码修改
        public static iwebhostbuilder createwebhostbuilder(string[] args)
        {
            var configuration = new configurationbuilder().setbasepath(environment.currentdirectory)
                                          .addjsonfile("host.json")
                                          .build();

            var url = configuration["url"];

            return webhost.createdefaultbuilder(args).useurls(configuration["url"])
                                                     .usestartup<startup>();
        }

问题倒是解决了,但是总发现有一点不爽,突然新来的configration就好像半路杀出的陈咬金,所以说如果将陈咬金收编过来就完美了。
三:不够优雅后的整合
接下来你很容易会在webhostbuilder中发现另一个方法useconfiguration,看参数就是用来接收configurationroot的,所以就把代码修改如下:
        public static iwebhostbuilder createwebhostbuilder(string[] args)
        {
            var configuration = new configurationbuilder().setbasepath(environment.currentdirectory)
                                          .addjsonfile("host.json")
                                          .build();

            //var url = configuration["url"];

            return webhost.createdefaultbuilder(args).useconfiguration(configuration)
                                                     .usestartup<startup>();
        }
但是这里有一个问题,asp.netcore能识别我自定义的url吗?肯定是不能识别的啦,那问题就是,aspnetcore模式会用哪一个key作为url的地址呢??
要找到答案的话得需要从源码上啦,从useurls入手吧。

从上面可以看到,useurls默认是使用 webhostdefaults.serverurlskey 作为url的key的,然后继续f12看一下它的 内容是什么?

好了,真想大白了,原来是urls,接下来我只需要把host.json 的url改成urls就可以了,对吧。
{
    "urls": "http://www.lhsxpumps.com/_*:9099"
}

四:解决办法3 (使用docker)
如果你不想做出任何改变,不想做任何退步,那没办法,只能把你关进docker里啦。
1. dockerfile
from microsoft/dotnet:2.1-aspnetcore-runtime

maintainer hxc@qq.com

run mkdir /data

copy ./publish/ /data

workdir /data

cmd [ "dotnet","webapplication1.dll" ]
2. publish 文件夹
在dockerfile的同级目录下,新建一个publish文件夹用来存放当前dll文件。

3. 通过build从dockerfile中构建镜像
[root@localhost tsweb]# docker build --rm -f ts.dockerfile -t a/netcore:v1 .
sending build context to docker daemon  2.56 kb
step 1/6 : from microsoft/dotnet:2.1-sdk
 ---> bde01d9ed6eb
step 2/6 : maintainer hxc@qq.com
 ---> using cache
 ---> 3af0c3f7c416
step 3/6 : run mkdir /data
 ---> using cache
 ---> 97137ffc5449
step 4/6 : copy ./publish/ /data
 ---> using cache
 ---> 77a94f1a0b8f
step 5/6 : workdir /data
 ---> using cache
 ---> 6778c2054a7b
step 6/6 : cmd dotnet  webapplication1.dll
 ---> running in e4a69b32e702
 ---> 9ed3a9769610
removing intermediate container e4a69b32e702
successfully built 9ed3a9769610
4. 最后启动镜像,用8888绑定到默认的5000端口
[root@localhost tsweb]# docker run -d -p 8888:5000 --name a-webcore-v1 a/netcore:v1
f94c727b98d5654aa560308752c2af7cde550b6cc06c520bd438e4ccf1fa616d
5. 然后你清楚的看到8888端口已经打开了,但是却不能访问,尴尬。。。
[root@localhost tsweb]# netstat -tlnp
active internet connections (only servers)
proto recv-q send-q local address           foreign address         state       pid/program name
tcp        0      0 192.168.122.1:53        0.0.0.0:*               listen      1834/dnsmasq
tcp        0      0 0.0.0.0:22              0.0.0.0:*               listen      1135/sshd
tcp        0      0 127.0.0.1:631           0.0.0.0:*               listen      1136/cupsd
tcp        0      0 127.0.0.1:25            0.0.0.0:*               listen      1582/master
tcp6       0      0 :::3306                 :::*                    listen      2451/mysqld
tcp6       0      0 :::22                   :::*                    listen      1135/sshd
tcp6       0      0 ::1:631                 :::*                    listen      1136/cupsd
tcp6       0      0 :::8888                 :::*                    listen      9531/docker-proxy-c
tcp6       0      0 ::1:25                  :::*                    listen      1582/master
[root@localhost tsweb]#

6. 解决这个问题的第一步就要看一下 容器中真的开放出来了5000端口吗,可通过docker logs 或 docker ps 查看
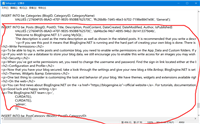
[root@localhost tsweb]# docker logs b-webcore-v1
hosting environment: production
content root path: /data
now listening on: http://[::]:80
application started. press ctrl+c to shut down.
[root@localhost tsweb]#
原来开放的是80端口哈~~~~ 那就简单了,把原来的容器给删了,重新生成一个容器再映射一下就好啦。
[root@localhost tsweb]# docker rm -f b-webcore-v1
b-webcore-v1
[root@localhost tsweb]# docker run -d -p 8888:80 --name b-webcore-v1 b/netcore:v1
e58039e02740e37cc431c1176fbf586ab19b02bd9331040e4719e9d46e51627d
[root@localhost tsweb]#

终于解决了,好了,本篇就说到这里,希望对你有帮助。
如对本文有疑问,请在下面进行留言讨论,广大热心网友会与你互动!! 点击进行留言回复


asp.net搭建博客,使用BlogEngine.NET+MySql搭建博客
网友评论