立即博19119存100送58,爱是一个幸福的子弹,娜高假体隆胸多少钱
导言:
在前面2节教程,我们探讨了如何使用fileupload控件从客户端向服务器上传文件,以及如何在数据web控件里显示二进制数据。
在本节,我们将创建一个web页面以添加新的种类。除了为类的name和description属性添加textboxes控件外,我们还要在页面上添加2个fileupload控件——一个用来上传新类的图片,另一个用来上传类的小说明册子。上传的图片将直接存储在新记录的picture列。与此相反,小册子将存储在~/brochures 文件夹,同时将文件路径存储在新记录的brochurepath列。
在创建页面之前,我们需要更新体系结构。由于categoriestableadapter的主查询并不返回picture列,因此自动生产的insert方法只包含了categoryname, description和brochurepath列。我们需要在tableadapter里创建新的方法以包括categories的4个列。同时业务逻辑层的的categoriesbll类也需要更新。
第1步:在categoriestableadapter添加一个insertwithpicture方法
在前面的教程《》里我们创建了categoriestableadapter,并设置其自动生成了基于主查询的insert, update和delete命令。此外,我们设置该tableadapter启用db direct方法,它将创建insert, update和delete方法。这些方法执行自动生成的insert, update和delete命令,自然而然的,其接受的输入参数基于主查询所返回的那些列。在教程《使用fileupload上传文件》里,我们扩展了 categoriestableadapter的主查询以包含brochurepath列。
因为categoriestableadapter的主查询并为引用picture,在添加新记录或更新记录时不能涉及picture值。为了获取picture信息,我们要么在tableadapter里创建一个新方法以插入picture的二进制数据;要么定制自动生成的insert命令。但定制自动生成的insert命令有一个风险,即定制的insert命令有可能被向导覆盖。比如,假设我们定制insert命令使用picture列,更新tableadapter的insert方法,使之多包含一个对应picture二进制数据的参数。然后在业务逻辑层创建一个方法使用该 dal方法,再在表现层调用该业务逻辑层方法。现在一切工作正常,但当下一次在tableadapter设置向导里设置tableadapter完成后,我们定制的insert命令马上就会被向导重写,回归到定制前的状态。其结果是我们的代码将无法编译!
注意:如果使用存储过程而不用sql语句的话,就不存在这个问题。在以后的教程里,我们将探讨在数据访问层用存储过程替代sql语句。
为避免这个头痛的问题,我们为tableadapter添加新的方法,而不定制自动生成的sql命令。我们为添加的方法命名为insertwithpicture,它接受 categoryname, description, brochurepath和picture值;执行insert命令将上述值添加进一条记录。
在categoriestableadapter的顶部点右键,选择“添加查询”。进入tableadapter 查询设置向导,首先询问我们tableadapter查询如何访问数据库,选择“使用sql语句”,点next,因为我们要为表categories添加新记录,选“insert”,点next。

图1:选“insert”选项
现在,我们需要指定insert sql语句。向导自动地生成一个基于主查询的insert语句。此时,它只插入categoryname, description和brochurepath值。对其更新,包括picture列和参数@picture ,如下:
insert into [categories]
 ([categoryname], [description], [brochurepath], [picture])
values
 (@categoryname, @description, @brochurepath, @picture)
最后,向导要我们为方法命名,取名为insertwithpicture,点finish。

图2:为新方法命名为insertwithpicture
第2步:更新业务逻辑层
由于一般来说表现层将引用业务逻辑层,而不是绕过它直接引用数据访问层,我们需要创建一个业务逻辑层方法,以调用刚才创建的数据访问层方法(insertwithpicture),本节,我们在categoriesbll里创建一个名为insertwithpicture方法,它接受3个字符串和一个byte数组,字符串参数对应name, description和brochure文件地址;byte数组对应于图片的二进制内容。就像下面的代码所显示的那样,bll方法调用相应dal方法:
[system.componentmodel.dataobjectmethodattribute
 (system.componentmodel.dataobjectmethodtype.insert, false)]
public void insertwithpicture(string categoryname, string description,
 string brochurepath, byte[] picture)
{
 adapter.insertwithpicture(categoryname, description, brochurepath, picture);
}
注意:在为bll添加insertwithpicture方法前,确保已经保存了数据集(typed dataset ),因为categoriestableadapter类的代码是基于typed dataset自动生成的。如果最开始没有把对typed dataset所进行的修改保存的话,adapter属性将不认同insertwithpicture方法。
第3步:列出现有的种类及其二进制数据
本教程我们将创建一个页面,允许用户添加新的类,包含其图片和说明小册子。在上一节,我们用一个包含templatefield和imagefield的gridview控件来展示每个类的名称、描述,并包含一个下载说明小册子的链接。在本教程,我们实现相同的功能,创建一个页面,即展示现有的类,还可以添加新的类。
打开binarydata文件夹的displayordownload.aspx页面,切换到源模式,复制gridview和objectdatasource控件的声明代码,粘贴在uploadindetailsview.aspx页面的<asp:content>元素里。同时不要忘记将后台代码类的generatebrochurelink方法拷贝到uploadindetailsview.aspx的后台代码类里。

图3:将displayordownload.aspx页面的声明代码拷贝到页面uploadindetailsview.aspx
完成以后,在浏览器里查看该页面,确保一切正常。gridview控件里列出了8个类,每个类包含一张图片以及一个下载说明小册子的链接。

图4:你应该看到每个类及其相应二进制数据
第4步:设置categoriesdatasource以支持添加功能
那个id为categories的gridview控件所使用的名为categoriesdatasource的 objectdatasource控件目前还不支持添加数据。为实现该功能,我们要设置该控件的insert方法引用类categoriesbll的某个方法。具体的讲,我们要用到在第2步里添加的insertwithpicture方法。
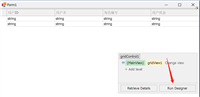
在objectdatasource控件的智能标签里,点“设置数据源”。照原样一直点到“define data methods”界面。再点insert标签,从下拉列表里选方法“insertwithpicture”,点finish完成设置。

图5:设置objectdatasource控件使用insertwithpicture方法
注意:当完成设置后,visual studio会问你是否“刷新fields and keys”,选择no,因为如果选yes的话,将重新构造data web controls fields,那样将重写所有我们已经定制好的列(field)。
完成设置后,objectdatasource控件将会为insertmethod属性赋值,同时包含一个<insertparameters>,如下面的声明代码所示:
<asp:objectdatasource id="categoriesdatasource" runat="server"
 oldvaluesparameterformatstring="original_{0}" selectmethod="getcategories"
 typename="categoriesbll" insertmethod="insertwithpicture">
 <insertparameters>
 <asp:parameter name="categoryname" type="string" />
 <asp:parameter name="description" type="string" />
 <asp:parameter name="brochurepath" type="string" />
 <asp:parameter name="picture" type="object" />
 </insertparameters>
</asp:objectdatasource>
第5步:创建一个插入界面
在教程16《》里我们谈到,当detailsview控件的数据源控件支持添加功能时,便可以启用detailsview内置的添加界面。让我们在页面上添加一个detailsview控件,置于gridview控件之上,并处于添加模式。当在detailsview控件里添加一个新种类时,其下的gridview控件将自动发生刷新,并将刚添加的类显示出来。
从工具箱拖一个detailsview控件到页面,置于gridview之上,设其id为newcategory,清空其height和width属性。 其智能标签里,设置它绑定到名为categoriesdatasource的数据源,并启用“插入”功能。

图6:将detailsview控件绑定到categoriesdatasource,并启用插入功能。
为使detailsview呈现为插入界面,设其defaultmode属性为insert
我们注意到,尽管detailsview控件有5个boundfields——categoryid, categoryname, description, numberofproducts和brochurepath,但插入界面并不包含categoryid,因为categoryid列的insertvisible属性为false。为什么会显示这4个列呢?因为objectdatasource调用的getcategories()方法返回的就是这些列。当添加新类时,我们不希望用户为numberofproducts列指定值,此外,我们还希望让用户为新类上传图片和相关的pdf小册子。
在detailsview里将numberofproducts列完成删除,再分别categoryname列和brochurepath列的headertext属性设置为“category”和“brochure”。将brochurepath 转换为templatefield,再添加一个templatefield,设其headertext属性为“picture”,把它放置在brochurepath列和commandfield列之间。

图7:将detailsview控件绑定到categoriesdatasource,并启用插入功能(注:图片说明有误)
当你在“编辑列”对话框里将brochurepath boundfield 转换为一个templatefield后,该templatefield将包含3个模板:itemtemplate,edititemtemplate和insertitemtemplate,由于我们只需要insertitemtemplate模板,将另外2个模板删除。如此,你的detailsview控件的声明代码看起来应该像下面的这样:
<asp:detailsview id="newcategory" runat="server" autogeneraterows="false"
 datakeynames="categoryid" datasourceid="categoriesdatasource"
 defaultmode="insert">
 <fields>
 <asp:boundfield datafield="categoryid" headertext="categoryid"
  insertvisible="false" readonly="true"
  sortexpression="categoryid" />
 <asp:boundfield datafield="categoryname" headertext="category"
  sortexpression="categoryname" />
 <asp:boundfield datafield="description" headertext="description"
  sortexpression="description" />
 <asp:templatefield headertext="brochure" sortexpression="brochurepath">
  <insertitemtemplate>
  <asp:textbox id="textbox1" runat="server"
   text='<%# bind("brochurepath") %>'></asp:textbox>
  </insertitemtemplate>
 </asp:templatefield>
 <asp:templatefield headertext="picture"></asp:templatefield>
 <asp:commandfield showinsertbutton="true" />
 </fields>
</asp:detailsview>
为brochure和picture fields添加fileupload控件
当前,brochurepath templatefield的insertitemtemplate模板包含一个textbox,而picture templatefield并不包含任何的模板,我们为这2个templatefield的insertitemtemplate模板模板添加fileupload控件。
从detailsview控件的智能标签选择“编辑模板”,从下拉列表选择brochurepath templatefield的insertitemtemplate模板,将模板里的textbox删除,从工具箱拖一个fileupload控件到页面,设其id为brochureupload。类似的,为picture templatefield的insertitemtemplate模板添加一个id为pictureupload的fileupload控件。

图8:在insertitemtemplate模板里添加一个fileupload控件
完成添加后,这2个templatefield的声明代码应该和下面的差不多:
<asp:templatefield headertext="brochure" sortexpression="brochurepath">
 <insertitemtemplate>
 <asp:fileupload id="brochureupload" runat="server" />
 </insertitemtemplate>
</asp:templatefield>
<asp:templatefield headertext="picture">
 <insertitemtemplate>
 <asp:fileupload id="pictureupload" runat="server" />
 </insertitemtemplate>
</asp:templatefield>
当用户添加一个新类时,我们希望确保上传的图片和说明小册子是恰当的文件类型。对说明小册子,必须是pdf类型;对图片,我们需要用户上传一个image文件。那是不是image文件必须是某个特定的类型呢,比如gif或jpg?考虑到其它不同类型的文件,我们需要扩展表categories的列以包含这些类型的文件,同时我们可以在页面displaycategorypicture.aspx里通过response.contenttype将这些文件发送到客户端。由于表categories现在并没有这样的列,我们只有限制用户上传指定为某种类型的image文件。表categories里现有的images为位图,不过使用jpg类型或许更恰当。
当用户上传的文件类型不正确时,我们将取消插入操作,并显示一个提示信息。在detailsview控件下添加一个label web控件,设id为uploadwarning,清除text属性,设cssclass属性为“warning”, 再将visible和enableviewstate属性都设为false。warning css定义在styles.css里,作用是将文字显示为粗斜体,红色大号字。
注意:最理想的情况是将categoryname和description boundfields都转换为templatefields,达到定制插入界面的目的。比如,对description插入界面来说,使用一个允许分行的文本框或许更好;对categoryname插入界面,因为categoryname不允许为null值,我们应该添加一个requiredfieldvalidator控件,以确保输入类的名称。这些步骤都留给读者做练习,更深入的探讨请参考前面的教程之20《》
第6步:将上传的小册子保存在服务器的文件系统
但用户键入相关的类别信息,点insert按钮后,发生页面回传,接着发生一连串的插入流程。首先,detailsview控件的iteminserting event事件发生;接着,调用objectdatasource控件的insert()方法,它将导致categories表添加新记录;最后,发生detailsview控件的iteminserted event事件。
在调用objectdatasource控件的insert()方法以前,我们必须确保用户已经上传了恰当的文件并保存在服务器的文件系统。为此,我们为detailsview控件的iteminserting事件创建一个事件处理器,添加如下的代码:
// reference the fileupload control
fileupload brochureupload =
 (fileupload)newcategory.findcontrol("brochureupload");

if (brochureupload.hasfile)
{
 // make sure that a pdf has been uploaded
 if (string.compare(system.io.path.getextension
 (brochureupload.filename), ".pdf", true) != 0)
 {
 uploadwarning.text =
  "only pdf documents may be used for a category's brochure.";
 uploadwarning.visible = true;
 e.cancel = true;
 return;
 }
}
代码首先引用detailsview控件模板里名为brochureupload的fileupload控件,如果已经上传了文件,就检查fileupload控件的extension是否为“.pdf”, 如果不是则取消插入操作并退出。
注意:通过检查文件的扩展名(extension)来确保用户上传的为pdf文件的做法并不是万全之策。比如,可能用户的确上传的是pdf文件,只不过其扩展名为.brochure;或者用户提供的并不是pdf文件,却使用.pdf的扩展名。保险的做法是通过编程对文件内容做最后一次检查。如此一来,虽然彻底,但稍嫌过头(overkill)。在绝大多数情况下,检查文件扩展名就已经足够了。
就像在教程《使用fileupload上传文件》里讨论的那样,将文件保存在文件系统里时要特别小心,以免覆盖别人上传的文件。本节,我们尝试对上传文件使用一个已经使用的名字,在名字末尾添加一个数字,以示区别。举例,如果在文件夹~/brochures里存在一个名为meats.pdf的文件,上传文件时我们取名为meats-1.pdf,如果文件夹里恰好也存在一个meats-1.pdf文件,我们就取名为meats-2.pdf,以此类推,直到文件名唯一为止。
下面的代码使用file.exists(path)方法来判断是否已经存在同名文件,如果存在,就重新命名,直到名字唯一为止:
const string brochuredirectory = "~/brochures/";
string brochurepath = brochuredirectory + brochureupload.filename;
string filenamewithoutextension =
 system.io.path.getfilenamewithoutextension(brochureupload.filename);

int iteration = 1;

while (system.io.file.exists(server.mappath(brochurepath)))
{
 brochurepath = string.concat(brochuredirectory,
 filenamewithoutextension, "-", iteration, ".pdf");
 iteration++;
}
一旦找到唯一的文件名后,立即将文件保存在文件系统,同时更新objectdatasource控件的insertparameter参数brochurepath的值,以便将文件名写入数据库。就像在教程《使用fileupload上传文件》里看到的一样,可以使用fileupload控件的saveas(path)方法来保存文件。使用e.values集合来更新objectdatasource控件的参数brochurepath。
// save the file to disk and set the value of the brochurepath parameter
brochureupload.saveas(server.mappath(brochurepath));
e.values["brochurepath"] = brochurepath;
第7步:将上传的图片保存到数据库
为了把上传的图片保存在新添加的记录里,我们需要在detailsview控件的iteminserting事件里,用上传的数据对objectdatasource控件的picture参数赋值。然而,在此之前,我们需要确保上传的文件为jpg而不是其它的什么格式。就象在第6步中探讨的一样,我们用文件的扩展名来检查其类型。
虽然categories表允许picture列为null值,但所有的种类都应该有一张图片。在本页面,我们强制用户添加记录时提供图片。下面的代码确保已经上传图片,且为恰当的类型。
// reference the fileupload controls
fileupload pictureupload = (fileupload)newcategory.findcontrol("pictureupload");
if (pictureupload.hasfile)
{
 // make sure that a jpg has been uploaded
 if (string.compare(system.io.path.getextension(pictureupload.filename),
  ".jpg", true) != 0 &&
 string.compare(system.io.path.getextension(pictureupload.filename),
  ".jpeg", true) != 0)
 {
 uploadwarning.text =
  "only jpg documents may be used for a category's picture.";
 uploadwarning.visible = true;
 e.cancel = true;
 return;
 }
}
else
{
 // no picture uploaded!
 uploadwarning.text =
 "you must provide a picture for the new category.";
 uploadwarning.visible = true;
 e.cancel = true;
 return;
}
这些代码应放在第6步中的代码前面,如果上传的文件有问题,事件处理器在文件保存到文件系统前就结束了。
假设上传的文件没有问题,然后我们用下面的代码将上传文件的数据分配给参数picture:
// set the value of the picture parameter
e.values["picture"] = pictureupload.filebytes;
完整的iteminserting事件处理器
下面是iteminserting事件处理器的完整代码:
protected void newcategory_iteminserting(object sender, detailsviewinserteventargs e)
{
 // reference the fileupload controls
 fileupload pictureupload = (fileupload)newcategory.findcontrol("pictureupload");
 if (pictureupload.hasfile)
 {
 // make sure that a jpg has been uploaded
 if (string.compare(system.io.path.getextension(pictureupload.filename),
  ".jpg", true) != 0 &&
  string.compare(system.io.path.getextension(pictureupload.filename),
  ".jpeg", true) != 0)
 {
  uploadwarning.text =
  "only jpg documents may be used for a category's picture.";
  uploadwarning.visible = true;
  e.cancel = true;
  return;
 }
 }
 else
 {
 // no picture uploaded!
 uploadwarning.text =
  "you must provide a picture for the new category.";
 uploadwarning.visible = true;
 e.cancel = true;
 return;
 }

 // set the value of the picture parameter
 e.values["picture"] = pictureupload.filebytes;


 // reference the fileupload controls
 fileupload brochureupload =
 (fileupload)newcategory.findcontrol("brochureupload");
 if (brochureupload.hasfile)
 {
 // make sure that a pdf has been uploaded
 if (string.compare(system.io.path.getextension(brochureupload.filename),
  ".pdf", true) != 0)
 {
  uploadwarning.text =
  "only pdf documents may be used for a category's brochure.";
  uploadwarning.visible = true;
  e.cancel = true;
  return;
 }

 const string brochuredirectory = "~/brochures/";
 string brochurepath = brochuredirectory + brochureupload.filename;
 string filenamewithoutextension =
  system.io.path.getfilenamewithoutextension(brochureupload.filename);

 int iteration = 1;

 while (system.io.file.exists(server.mappath(brochurepath)))
 {
  brochurepath = string.concat(brochuredirectory, filenamewithoutextension,
  "-", iteration, ".pdf");
  iteration++;
 }

 // save the file to disk and set the value of the brochurepath parameter
 brochureupload.saveas(server.mappath(brochurepath));
 e.values["brochurepath"] = brochurepath;
 }
}
第8步:更新displaycategorypicture.aspx页面
让我们花几分钟测试我们在上几步创建的插入界面和iteminserting事件处理器。在浏览器查看uploadindetailsview.aspx页面 ,尝试添加一个类,忽略picture或指定一个非jpg的图片或非pdf的小册子。以上任何一种情况下,都会显示一个错误信息,并取消插入操作。

图9:当上传的文件不对时将显示一个警告信息
确认页面要求上传一张图片,且不接受非pdf或非jpg文件。添加一个包含jpg格式图片的新类别,将brochure列置空,点击insert按钮后,页面回传,将为categories表添加一个新记录,同时上传的图片数据直接存储进数据库。gridview控件更新后,将新添加的类显示出来。但是,就像图10所示的那样,类的图片没有正确的显示出来。

图10:新类的图片没有显示出来
图片没有显示出来的原因是因为用来返回特定类的图片的页面displaycategorypicture.aspx被设置为处理带ole报头的位图。当picture列的数据被返回到客户端前已经把那78字节的报头剥离掉。而且上传的jpg文件并没有ole报头,因此,必需的字节已经从图片的二进制数据移除了。
由于现在表categories里既有jpg文件又有带ole报头的位图,我们需要对页面displaycategorypicture.aspx做调整,使它对原来的8个类剥离ole报头,而不对新添加的类进行剥离。在后面的教程,我们探讨如何更新现有记录的image文件,并将所有以前的类的图片调整为jpg格式。现在,我们在页面displaycategorypicture.aspx 里用下面的代码将原来的8个类的ole报头剥离。
protected void page_load(object sender, eventargs e)
{
 int categoryid = convert.toint32(request.querystring["categoryid"]);

 // get information about the specified category
 categoriesbll categoryapi = new categoriesbll();
 northwind.categoriesdatatable categories =
 categoryapi.getcategorywithbinarydatabycategoryid(categoryid);
 northwind.categoriesrow category = categories[0];

 if (categoryid <= 8)
 {
 // for older categories, we must strip the ole header... images are bitmaps

 // output http headers providing information about the binary data
 response.contenttype = "image/bmp";

 // output the binary data
 // but first we need to strip out the ole header
 const int oleheaderlength = 78;
 int strippedimagelength = category.picture.length - oleheaderlength;
 byte[] strippedimagedata = new byte[strippedimagelength];
 array.copy(category.picture, oleheaderlength, strippedimagedata,
  0, strippedimagelength);

 response.binarywrite(strippedimagedata);
 }
 else
 {
 // for new categories, images are jpgs...

 // output http headers providing information about the binary data
 response.contenttype = "image/jpeg";

 // output the binary data
 response.binarywrite(category.picture);
 }
}
做了上述修改后,jpg图片现在可以正确的在gridview控件显示出来了。

图11:新添加的类的jpg图片可以正确显示了
第9步:出现异常时删除brochure文件
将上传文件保存在文件系统还面临一个问题,即无法将数据与存储模式关联起来。当删除一条记录时,存储在文件系统的相应文件也应该删除;类似地,添加记录时,亦然。假定这些情况:当一个用户添加一个新的种类时,他指定了一张图片和一份说明小册子。点击insert按钮后,引发页面回传,发生detailsview控件的iteminserting事件,将文件保存到服务器文件系统;接下来,objectdatasource控件的insert()方法调用categoriesbll类的insertwithpicture方法,它又调用categoriestableadapter的insertwithpicture方法。
如果数据库刚好处于离线状态,或者insert sql语句有错误,那又会怎么样呢?毫无疑问添加记录会失败。最终结果是,向数据库添加记录失败了,但却成功地向服务器文件系统上传了文件。当插入过程抛出异常时,应该将该文件删除。
在教程18《在asp.net页面中处理bll/dal层的异常》里,我们提到体系构架的不同层都可能抛出异常。在表现层,我们可以通过detailsview控件的iteminserted事件判断是否发生了异常,同时提供objectdatasource控件的insertparameters参数值。因此,我们为iteminserted事件创建一个事件处理器,检查是否抛出异常,如果是则删除the objectdatasource控件的brochurepath参数指定的文件。
protected void newcategory_iteminserted
 (object sender, detailsviewinsertedeventargs e)
{
 if (e.exception != null)
 {
 // need to delete brochure file, if it exists
 if (e.values["brochurepath"] != null)
  system.io.file.delete(server.mappath(
  e.values["brochurepath"].tostring()));
 }
}
总结
我们要经过几个步骤来创建一个基于web的添加界面,该界面允许添加记录包含二进制数据。如果选择直接存储在数据库,我们将对体系结构做一些调整,为了实现插入二进制数据,需要添加相应的方法;调整完体系结构下一步就需要创建一个添加界面,可以使用detailsview控件,并定制其包含fileupload控件。上传的文件可以存储在服务器的文件系统,或者在detailsview控件的iteminserting事件处理器里对一个数据源参数(data source parameter)赋值。
将数据保存在文件系统还需要注意选用一个命名体系,以避免一个用户上传的文件将另一个用户上传的文件覆盖掉。另外,当向数据库插入数据失败时,必须将上传的文件删除掉。
现在我们可以向系统添加新的种类并附带其图片和说明小册子。在下一章我们探讨如何更新现有的类,以及当删除一个类时如何正确的移除对应的二进制数据。
祝编程快乐!
作者简介
本系列教程作者 scott mitchell,著有六本asp/asp.net方面的书,是4guysfromrolla.com的创始人,自1998年以来一直应用 微软web技术。大家可以点击查看全部教程《[翻译]scott mitchell 的asp.net 2.0数据教程》,希望对大家的学习asp.net有所帮助。
如对本文有疑问,请在下面进行留言讨论,广大热心网友会与你互动!! 点击进行留言回复


asp.net搭建博客,使用BlogEngine.NET+MySql搭建博客
网友评论