焦饭活命,阴囊蛙,雾岛奈津美全集种子
本文实例讲述了ci框架集成smarty的方法。分享给大家供大家参考,具体如下:
因为ci自带的模板功能不是很方便,所以大家普遍采用集成smarty的方式来弥补ci这方面的不足。
本人在网上看了不少ci集成smarty的教程,包括咱们ci论坛里面的一个精华帖子
http://codeigniter.org.cn/forums/forum.php?mod=viewthread&tid=10345。
自己对比了一下这些教程,我认为下面这个方案是所有里面最优秀的,强烈推荐给大家(当然也是我自己采取的方案)
出处:
http://www.cnmiss.cn/?p=261
原文里面的一些错误,我在本文里面已经做了修正
下面说下我认为它更加优秀的原因,对比下这个方案和我们论坛的方案,你会发现,这个方案多了一点就是它扩展了核心类,
它将smarty类方法assign和display扩展到ci的控制器中,所以我们在ci中使用smarty的时候可以像这样使用:
public function index()
{
    //$this->load->view('welcome_message');
    $data['title'] = '标题';
    $data['num'] = '123456789';
    //$this->cismarty->assign('data',$data); // 也可以
    $this->assign('data',$data);
    $this->assign('tmp','hello');
    //$this->cismarty->display('test.html'); // 也可以
    $this->display('test.html');
}
通过对核心控制器类的简单扩展,大家在ci中使用smary的时候和直接使用smarty的用法习惯是一样的,这是一个很大的优点啊。
而且从核心类库的扩展来看,大家也可以看出该文作者对于ci框架的理解是很好的。
根据这篇文章,我不仅成功集成了smaty,而且也进一步加强了对于ci的理解。
而且该方案将smarty的配置文件放到了ci框架的config目录下,对于两者,使用都很规范。
最终实现了"ci和smaty的无缝结合"。
下面开始是具体教程: // 我在原文的基础上做了一些修改,更正了原文的一些错误 注意下文中有'//'的地方,是我自己修改过的地方,或是自己又增加的地方。
ci版本:2.1.4 // (本文发布时使用的版本)
smarty版本:smarty-2.6.26 // 因为我之前用这个版本,为了照顾自己的使用习惯,这里没有使用最新的smaty版本,大家理解了扩展原理,可以选择自己想用的smatry版本。
1、到相应站点下载smarty的源码包; // 我这里用的是 smarty-2.6.26
2、将源码包里面的libs文件夹copy到ci的项目目录下面的libraries文件夹下,并重命名为smarty-2.6.26;//
3、在项目目录的libraries文件夹内新建文件cismarty.php,里面的内容如下:
<?php
if(!defined('basepath')) exit('no direct script asscess allowed');
require_once( apppath . 'libraries/smarty-2.6.26/libs/smarty.class.php' );
class cismarty extends smarty {
  protected $ci;
  public function __construct(){
    $this->ci = & get_instance();
    $this->ci->load->config('smarty');//加载smarty的配置文件
    //获取相关的配置项
    $this->template_dir  = $this->ci->config->item('template_dir');
    $this->complie_dir  = $this->ci->config->item('compile_dir');
    $this->cache_dir   = $this->ci->config->item('cache_dir');
    $this->config_dir   = $this->ci->config->item('config_dir');
    $this->template_ext  = $this->ci->config->item('template_ext');
    $this->caching    = $this->ci->config->item('caching');
    $this->cache_lifetime = $this->ci->config->item('lefttime');
  }
}
4、在项目目录的config文件夹内新建文件smarty.php文件,里面的内容如下:
<?php if ( ! defined('basepath')) exit('no direct script access allowed');
$config['theme']    = 'default';
$config['template_dir'] = apppath . 'views';
$config['compile_dir'] = fcpath . 'templates_c';
$config['cache_dir']  = fcpath . 'cache';
$config['config_dir']  = fcpath . 'configs';
$config['template_ext'] = '.html';
$config['caching']   = false;
$config['lefttime']   = 60;
5、在入口文件所在目录新建文件夹templates_c、cache、configs;
6、在项目目录下面的config目录中找到autoload.php文件
修改这项
$autoload['libraries'] = array('cismarty');
//目的是:让系统运行时,自动加载,不用人为的在控制器中手动加载
7、在项目目录的core文件夹中新建文件my_controller.php 内容如下: // 扩展核心控制类
<?php if (!defined('basepath')) exit('no direct access allowed.');
class my_controller extends ci_controller { // 原文这里写错
  public function __construct() {
    parent::__construct();
  }
  public function assign($key,$val) {
    $this->cismarty->assign($key,$val);
  }
  public function display($html) {
    $this->cismarty->display($html);
  }
}
配置完毕
使用方法实例:
在控制器中如:
<?php if ( ! defined('basepath')) exit('no direct script access allowed');
class welcome extends my_controller { // 原文这里写错
  public function index()
  {
    //$this->load->view('welcome_message');
    $data['title'] = '标题';
    $data['num'] = '123456789';
    //$this->cismarty->assign('data',$data); // 亦可
    $this->assign('data',$data);
    $this->assign('tmp','hello');
    //$this->cismarty->display('test.html'); // 亦可
    $this->display('test.html');
  }
}
然后再视图中:试图文件夹位于项目目录的views之下:
新建文件test.html
<!doctype html>
<html>
<head>
<meta charset="utf-8">
<title>{ $test.title}</title> //( 原文是 <title>{$test['title']}</title>,是错误的写法,也有可能是smarty版本的原因)
<style type="text/css">
</style>
</head>
<body>
{$test.num|md5} // 原文这里也写错了
<br>
{$tmp}
</body>
</html>
更多关于codeigniter相关内容感兴趣的读者可查看本站专题:《smarty模板入门基础教程》、《codeigniter入门教程》、《ci(codeigniter)框架进阶教程》、《php优秀开发框架总结》、《thinkphp入门教程》、《thinkphp常用方法总结》、《zend framework框架入门教程》、《php面向对象程序设计入门教程》、《php+mysql数据库操作入门教程》及《php常见数据库操作技巧汇总》
希望本文所述对大家基于codeigniter框架的php程序设计有所帮助。
如对本文有疑问,请在下面进行留言讨论,广大热心网友会与你互动!! 点击进行留言回复

YII2框架中使用RBAC对模块,控制器,方法的权限控制及规则的使用示例
YII2框架中ActiveDataProvider与GridView的配合使用操作示例
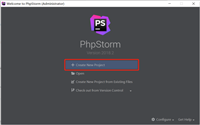
PhpStorm的使用教程(本地运行PHP+远程开发+快捷键)
网友评论