华夏烟标,小学生营养晚餐食谱,六号出口结局

内容:本文带大家使用identityserver4进行对api授权保护的基本策略
作者:zara(张子浩) 欢迎分享,但需在文章鲜明处留下原文地址。
本文将要讲述如何使用identityserver4对api授权保护以及如何携带token进行访问受保护的api,通过httpclient或http请求中的body这些我们都可以达到。那么废话不多说,开始吧~
首先我们一定要知道,我们访问要访问一个受安全限制的api的锁子是在一个专门的identityserver4验证服务器。所以呢,我们需要创建一个认证服务器。首先我们创建一个api项目。

创建完成之后,我们再创建一个config.cs,当然这个名字你随意,但你需要在di注入的时候与其对应。在 getsoluction 中定义了我们的api,也就是受保护的锁子,第一个参数是name,也就是api的名称,那么后面是显示的名字,也就是displayname。在 getclients 当中我们定义了受信任的客户端,其中有客户端的id,授权方式,客户端加密方式,通过 allowedscopes 还定义了这个客户端可以访问的api。
using identityserver4.models;
using system.collections.generic;

namespace identityserversolution
{
    /// <summary>
    /// zaranet 2019.1.26 14.10 create this file
    /// config是identityserver的配置文件,一会我们需要注册到di层。
    /// </summary>
    public class config
    {
        /// <summary>
        /// 这个apiresource参数就是我们api
        /// </summary>
        /// <returns></returns>
        public static ienumerable<apiresource> getsoluction()
        {
            return new[]
            {
               new apiresource("api1", "my api")
            };
        }
        public static ienumerable<client> getclients()
        {
            return new list<client>
            {
                new client
                {
                    clientid = "client",
                    allowedgranttypes = granttypes.clientcredentials,
                    clientsecrets = {
                        new secret("secret".sha256()),
                    },
                    allowedscopes = {"api1"}
                }
            };
        }
    }
}
我们现在已经写好了关于identityserver4服务器的配置文件,那么我们还需要去依赖注入到.net core管道中,现在我们看一下定义。
// this method gets called by the runtime. use this method to add services to the container.
        public void configureservices(iservicecollection services)
        {
            services.addidentityserver()
                .addinmemoryapiresources(config.getsoluction())
                    .addinmemoryclients(config.getclients())
                        .adddevelopersigningcredential();

            services.addmvc().setcompatibilityversion(compatibilityversion.version_2_1);
        }

        // this method gets called by the runtime. use this method to configure the http request pipeline.
        public void configure(iapplicationbuilder app, ihostingenvironment env)
        {
            //添加认证中间件
            app.useidentityserver();
            if (env.isdevelopment())
            {
                app.usedeveloperexceptionpage();
            }
            app.usemvc();
        }
就是这样 - 如果您运行服务器并浏览浏览器 http://localhost:您的端口/.well-known/openid-configuration ,您应该会看到所谓的发现文档。客户端和api将使用它来下载必要的配置数据。

首次启动时,identityserver将为您创建一个开发人员签名密钥,它是一个名为的文件tempkey.rsa。您不必将该文件检入源代码管理中,如果该文件不存在,将重新创建该文件。

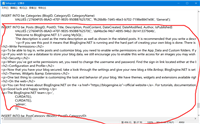
以下是用postman进行的测试,以httppost方式进行请求,并在http body中进行编辑请求体上下文,测试结果如下。如果三个参数没有问题就返回token,如果其中三个参数有一个写错,那么就会返回400错误(error:invalid_client)。

下面在api项目中添加控制器:
   [route("identity")]
    [authorize]
    [apicontroller]
    public class identitycontroller : controllerbase
    {
        [httpget]
        public iactionresult get()
        {
            return new jsonresult(from c in user.claims select new { c.type, c.value });
        }
    }
稍后将使用此控制器来测试授权要求,以及通过api的眼睛可视化声明身份。现在我们将身份验证服务添加到di和身份验证中间价到管道中,验证传入令牌以确保它来自受信任的颁发者。
将startup更新为如下所示:
public void configureservices(iservicecollection services)
        {
            services.addmvccore()
                    .addauthorization()
                    .addjsonformatters();
            services.addauthentication("bearer")
           .addjwtbearer("bearer", options =>
           {
               options.authority = "http://localhost:58653";
               options.requirehttpsmetadata = false;

               options.audience = "api1";
           });
            services.addmvc().setcompatibilityversion(compatibilityversion.version_2_1);
        }

        // this method gets called by the runtime. use this method to configure the http request pipeline.
        public void configure(iapplicationbuilder app, ihostingenvironment env)
        {
            app.useauthentication();
            if (env.isdevelopment())
            {
                app.usedeveloperexceptionpage();
            }
            app.usemvc();
        }
 addauthentication 是为了用于将identityserver4访问令牌验证处理程序将在di中提供身份验证服务。 useauthentication 将身份验证中间件添加到管道中,以便在每次调用主机时自动执行身份验证。如果你现在转到 http://www.lhsxpumps.com/_localhost:prot/identity
中是401错误的话,说明api已经得到了保护。配置成功了!,现在我们要创建我们的客户端了。去访问受保护的api需要携带钥匙,那么这个钥匙术语叫做令牌,那就是通往大门的令牌!现在立刻创建一个控制台程序,使用令牌访问api。
首先我们需要安装identitymodel,因为它可以替我们找到元数据。

identitymodel包括用于发现端点的客户端库。这样您只需要知道identityserver的基地址 - 可以从元数据中读取实际的端点地址:
var client = new httpclient();
var disco = await client.getdiscoverydocumentasync("http://localhost:58653");
if (disco.iserror)
{
    console.writeline(disco.error);
    return;
}
接下来,您可以使用发现文档中的信息来请求令牌:
var tokenresponse = await client.requestclientcredentialstokenasync(new clientcredentialstokenrequest
            {
                address = disco.tokenendpoint,
                clientid = "client",    //id
                clientsecret = "secret", //pwd
                scope = "api1"  //请求的api
            });

            if (tokenresponse.iserror)
            {
                console.writeline(tokenresponse.error);
                return;
            }
要将访问令牌发送到api,通常使用http authorization标头。这是使用 setbearertoken 扩展方法完成的:
var apiclient = new httpclient();
            apiclient.setbearertoken(tokenresponse.accesstoken);

            var response = await client.getasync("http://localhost:58653/identity");
            if (!response.issuccessstatuscode)
            {
                console.writeline(response.statuscode);
            }
            else
            {
                var content = await response.content.readasstringasync();
                console.writeline(jarray.parse(content));
            }
就这样,我们启动结果如下,启动顺序,应先启动身份认证平台,然后再启动api,在启动控制台调试工具。

就这样一个简单的identityserver4身份认证平台就ok了,现在是不是想要迫切的试一下呢?哈哈,关于源代码,我放到我的coding中了,地址是:https://coding.net/u/zaranet/p/identityserver,当然不要看着简单,还是自己敲一下吧,如果你一点都没有碰过identityserver的话。下面我们在回顾一下。

我们在 identityserversoluction 中定义了 config 文件,用于id4的配置,主要功能是为了认证模型,其中还设置了client请求文中的 clientid 这些参数等等。那么 identityapi 就是我们的项目服务,其中通过 authorize 标记的都是具有安全保护的api控制器,那么我们就需要去获取我们的identityserversoluction 中的验证,这样我们才可以访问,那么我们就用了.net core控制台程序去模拟了这个过程,其中涉及了 httpclient 相关知识。那么最后返回了我们的相关 token ,这样,我们可以根据 token 去获取我们想要的api服务了!
最后祝大家春运快乐。下一篇干货在等大家噢!
如对本文有疑问,请在下面进行留言讨论,广大热心网友会与你互动!! 点击进行留言回复


asp.net搭建博客,使用BlogEngine.NET+MySql搭建博客
网友评论