恶搞钓鱼岛,泰无聊游戏大厅下载,荒村客栈演员表
在软件开发中,管理和测试api是一件重要而富有挑战性的工作。在我之前的文章也专门阐述了通过文档管理工具,来保证api文档和代码的一致性,这样更加有助于团队的协作。
以往我们总是通过第三方平台工具来管理我们的api文档,如。在测试方面,我们也会依赖fiddler,postman这样的工具。
swagger兼具了api文档管理和测试的功能,而且保证了代码和文档的一致性。它提供了无需任何实现逻辑的restfulapi的ui表示。它允许用户在没有任何代码访问的情况下了解服务的功能,并减少创建服务文档的时间。
swagger兼具了api文档管理和测试的功能,而且保证了代码和文档的一致性。它提供了无需任何实现逻辑的restfulapi的ui表示。它允许用户在没有任何代码访问的情况下了解服务的功能,并减少创建服务文档的时间。
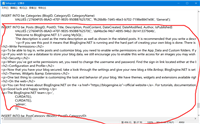
swagger使用swagger工具基于我们编写的服务代码生成的swagger.json文件来生成文档管理界面。此文件描述服务的功能,即服务支持多少方法,并提供有关方法参数的信息。使用这个文件,swaggerui生成客户机代码。下面是swagger.json文件的一个示例。
{
    "swagger": "2.0",
    "info": {
        "version": "1.0",
        "title": "my demo api"
    },
    "paths": {
        "/api/values": {
            "get": {
                "tags": ["values"],
                "summary": "get values",
                "operationid": "get",
                "consumes": [],
                "produces": ["text/plain", "application/json", "text/json"],
                "parameters": [],
                "responses": {
                    "200": {
                        "description": "success",
                        "schema": {
                            "uniqueitems": false,
                            "type": "array",
                            "items": {
                                "type": "string"
                            }
                        }
                    }
                }
            },
            "post": {
                "tags": ["values"],
                "operationid": "post",
                "consumes": ["application/json-patch+json", "application/json", "text/json", "application/*+json"],
                "produces": [],
                "parameters": [{
                    "name": "value",
                    "in": "body",
                    "required": false,
                    "schema": {
                        "type": "string"
                    }
                }],
                "responses": {
                    "200": {
                        "description": "success"
                    }
                }
            }
        }
    },
    "definitions": {}
}
在aps.net core web api 中,我们可以用swashbuckle.aspnetcore 和 nswag这两个包来实现swagger,而且二者都是github上开源的。此外,nswag还提供了生成typescript客户端代码的方法以及用于api的服务代码。
任务并行库(tpl)是system.threading和system.threading.tasks命名空间中的一组公共类型和api。
tpl动态地扩展并发度,以最有效地使用所有可用的处理器。通过使用tpl,您可以最大限度地提高代码的性能,同时专注于您的代码的业务实现。
从.net framework 4开始,tpl是编写多线程和并行代码的首选方式。
这里以swashbuckle.aspnetcore来实现。
以下是在asp.net core web api中配置swagger的步骤:
1. 安装swashbuckle.aspnetcore
pm> install-package swashbuckle.aspnetcore
2. 配置swagger中间件
要将swagger middle添加到请求管道,需要在startup类的configureservice方法中添加swaggergen方法。在这里,我们可以定义一个或多个swagger xml文档。
startup.cs
// this method gets called by the runtime. use this method to add services to the container.
        public void configureservices(iservicecollection services)
        {
            services.addmvc().setcompatibilityversion(compatibilityversion.version_2_2);
            services.addswaggergen(c =>
            {
                c.swaggerdoc("v1.0", new info { title = "my demo api", version = "1.0" });
                c.includexmlcomments(system.io.path.combine(system.appcontext.basedirectory, "zhikecore.api.xml"));
            });
        }
如果要启用这个中间件,我们还需要在startup类的configure方法中调用useswagger方法。在这里,我们还需要配置swagerendpoint来生成ui。useswagegrui将添加一个静态文件中间件来加载swager.json文件。
// this method gets called by the runtime. use this method to configure the http request pipeline.
        public void configure(iapplicationbuilder app, ihostingenvironment env)
        {
            if (env.isdevelopment())
            {
                app.usedeveloperexceptionpage();
            }
            else
            {
                // the default hsts value is 30 days. you may want to change this for production scenarios, see https://aka.ms/aspnetcore-hsts.
                app.usehsts();
            }

            app.usehttpsredirection();
            app.usemvc();

            app.useswagger();
            app.useswaggerui(c =>
            {
                c.swaggerendpoint("/swagger/v1.0/swagger.json", "my demo api (v 1.0)");
            });
        }
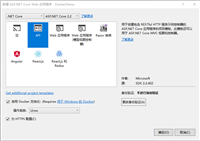
以上是配置swagger的基本步骤,如果我们想使用visual studio在开发环境中启动swagger,还需要做一点设置。选择项目-属性-debug,修改启动浏览器(launch browser)的值为swagger。

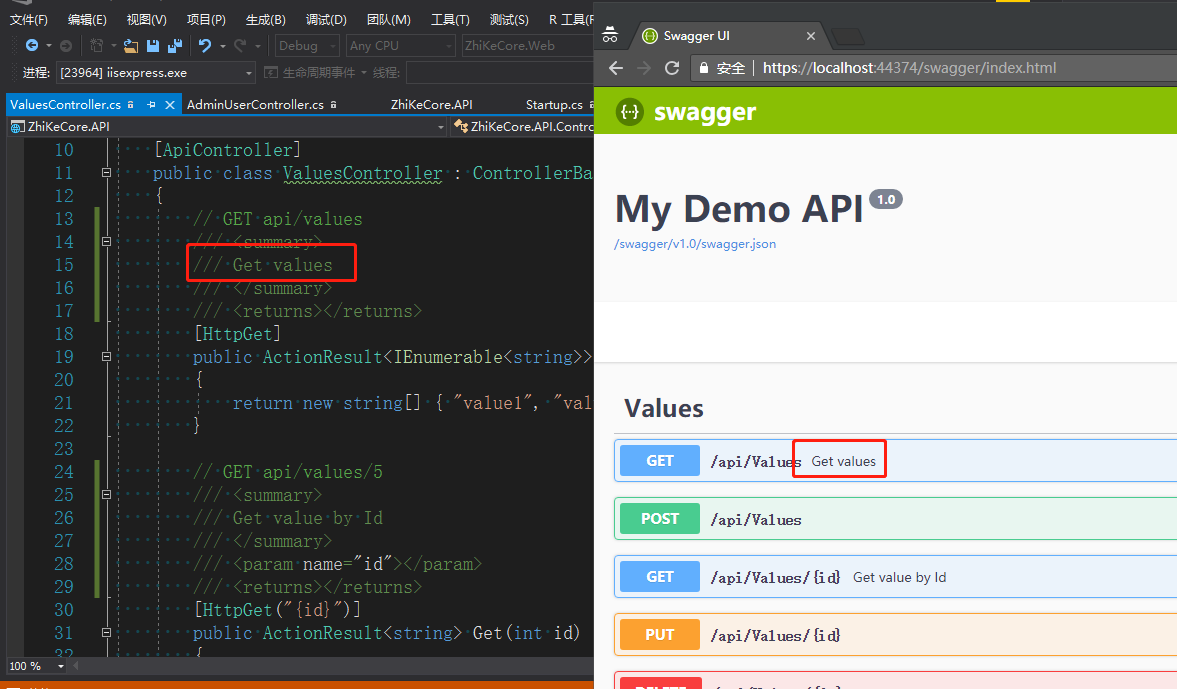
当我们启动程序以后,可以看到如下界面:

正如我们在这里看到的,它对每个http动词使用不同的颜色代码。当我们单击任何操作方法时,它将询问参数详细信息,当我们单击“非常”按钮时,它将向web api发送请求。
在测试我们的webapi时,swagger只需要最少的配置即可。
那么,如果我们想要在ui上显示代码注释应该怎么办呢?
在.net core中,我们可以通过在项目属性窗口的“构建”选项卡下设置“xml文档文件”属性来获取xml注释。
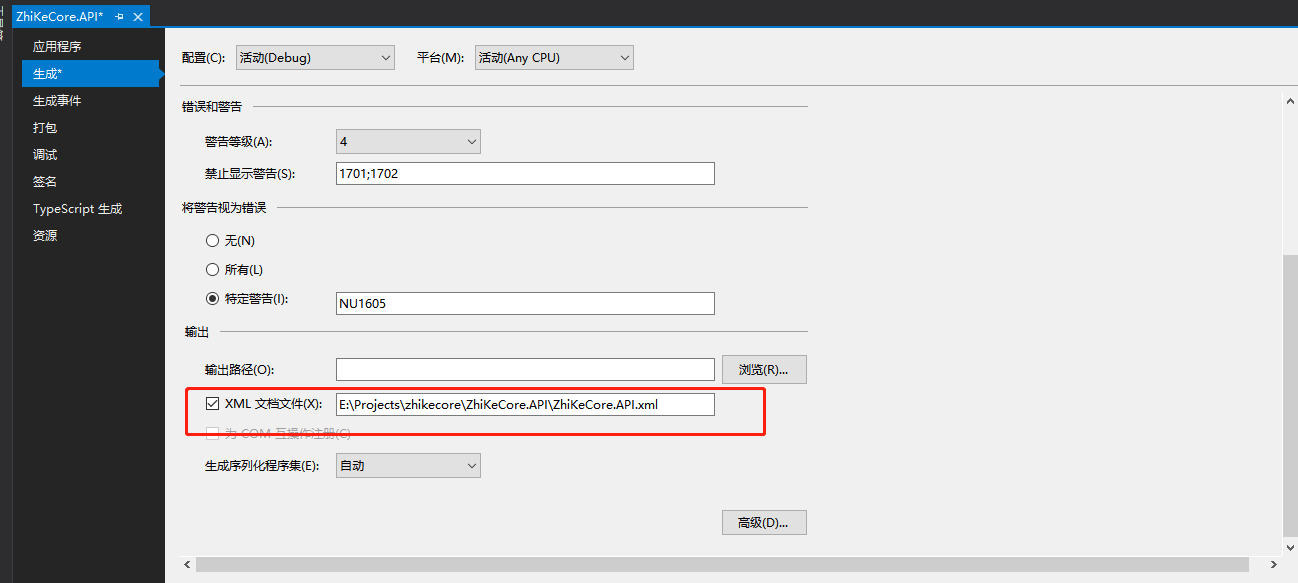
默认情况下,swagger ui不显示此文档。我们需要传递包含exmlcomments的路径。
// this method gets called by the runtime. use this method to configure the http request pipeline.
       // this method gets called by the runtime. use this method to add services to the container.
        public void configureservices(iservicecollection services)
        {
            services.addmvc().setcompatibilityversion(compatibilityversion.version_2_2);
            services.addswaggergen(c =>
            {
                c.swaggerdoc("v1.0", new info { title = "my demo api", version = "1.0" });
                c.includexmlcomments(system.io.path.combine(system.appcontext.basedirectory, "zhikecore.api.xml"));
            });
        }
参考
关注
请关注微信公众号智客坊。

如对本文有疑问,请在下面进行留言讨论,广大热心网友会与你互动!! 点击进行留言回复


asp.net搭建博客,使用BlogEngine.NET+MySql搭建博客
网友评论