无机化学第三版,罗永浩2013清华演讲,富贵小传
本文实例讲述了php迭代器接口iterator用法。分享给大家供大家参考,具体如下:
php iterator接口的作用是允许对象以自己的方式迭代内部的数据,从而使它可以被循环访问,iterator接口摘要如下:
iterator extends traversable {
  //返回当前索引游标指向的元素
  abstract public mixed current ( void )
  //返回当前索引游标指向的键
  abstract public scalar key ( void )
  //移动当前索引游标到下一元素
  abstract public void next ( void )
  //重置索引游标
  abstract public void rewind ( void )
  //判断当前索引游标指向的元素是否有效
  abstract public boolean valid ( void )
}
下面是一个简单的例子演示iterator的使用方法:
<?php
/**
 * 该类允许外部迭代自己内部私有属性$_test,并演示迭代过程
 *
 * @author 疯狂老司机
 */
class testiterator implements iterator {
  /*
   * 定义要进行迭代的数组
   */
  private $_test = array('dog', 'cat', 'pig');
  /*
   * 索引游标
   */
  private $_key = 0;
  /*
   * 执行步骤
   */
  private $_step = 0;
  /**
   * 将索引游标指向初始位置
   *
   * @see testiterator::rewind()
   */
  public function rewind() {
    echo '第'.++$this->_step.'步:执行 '.__method__.'<br>';
    $this->_key = 0;
  }
  /**
   * 判断当前索引游标指向的元素是否设置
   *
   * @see testiterator::valid()
   * @return bool
   */
  public function valid() {
    echo '第'.++$this->_step.'步:执行 '.__method__.'<br>';
    return isset($this->_test[$this->_key]);
  }
  /**
   * 将当前索引指向下一位置
   *
   * @see testiterator::next()
   */
  public function next() {
    echo '第'.++$this->_step.'步:执行 '.__method__.'<br>';
    $this->_key++;
  }
  /**
   * 返回当前索引游标指向的元素的值
   *
   * @see testiterator::current()
   * @return value
   */
  public function current() {
    echo '第'.++$this->_step.'步:执行 '.__method__.'<br>';
    return $this->_test[$this->_key];
  }
  /**
   * 返回当前索引值
   *
   * @return key
   * @see testiterator::key()
   */
  public function key() {
    echo '第'.++$this->_step.'步:执行 '.__method__.'<br>';
    return $this->_key;
  }
}
$iterator = new testiterator();
foreach($iterator as $key => $value){
  echo "输出索引为{$key}的元素".":$value".'<br><br>';
}
?>
以上例子将输出:
第1步:执行 testiterator::rewind
第2步:执行 testiterator::valid
第3步:执行 testiterator::current
第4步:执行 testiterator::key
输出索引为0的元素:dog
第5步:执行 testiterator::next
第6步:执行 testiterator::valid
第7步:执行 testiterator::current
第8步:执行 testiterator::key
输出索引为1的元素:cat
第9步:执行 testiterator::next
第10步:执行 testiterator::valid
第11步:执行 testiterator::current
第12步:执行 testiterator::key
输出索引为2的元素:pig
第13步:执行 testiterator::next
第14步:执行 testiterator::valid
从以上例子可以看出,如果执行valid返回false,则循环就此结束。
更多关于php相关内容感兴趣的读者可查看本站专题:《php面向对象程序设计入门教程》、《php数组(array)操作技巧大全》、《php基本语法入门教程》、《php运算与运算符用法总结》、《php字符串(string)用法总结》、《php+mysql数据库操作入门教程》及《php常见数据库操作技巧汇总》
希望本文所述对大家php程序设计有所帮助。
如对本文有疑问,请在下面进行留言讨论,广大热心网友会与你互动!! 点击进行留言回复

YII2框架中使用RBAC对模块,控制器,方法的权限控制及规则的使用示例
YII2框架中ActiveDataProvider与GridView的配合使用操作示例
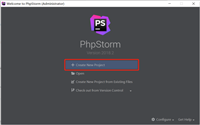
PhpStorm的使用教程(本地运行PHP+远程开发+快捷键)
网友评论