北京阅兵式,官路豪门,红警快捷键
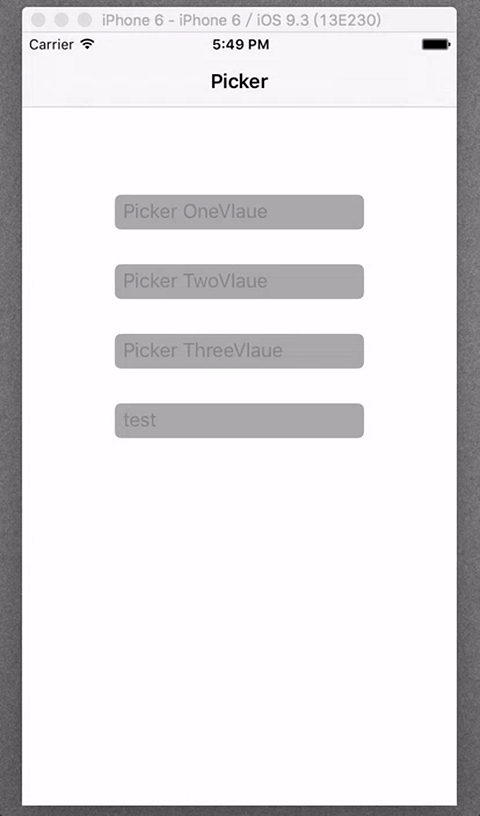
uipickerview平常用的地方好像也不是很多,顶多就是一些需要选择的地方,这次项目需要这一个功能,我就单独写了一个简单的demo,效果图如下:
新增主页面弹出view,在主页面添加的代码
有个小问题就是第四个直接添加在主页弹出来的view好像被导航栏给覆盖了,我还没去研究,就着急的先吧功能写了。大家谅解下
最初版本

话说我终于弄了gif了,再也不要去截图每张图都发一遍了!!
这个demo呢,等于是可以拿来直接用的第三方了吧,只需要传数据就可以了,弹出的三个框显示的数据也不一样,我的封装能力不行,所以都是单独写了,在这里呢,我先把链接发上,大家要是没有耐心的其实可以直接看demo,下载了,看下代码基本上就会了。ylspicker。
实现的基本思路呢,其实也挺简单的。我这里就说下我实现的过程,然后贴上代码片段,大家可以看一下。
第一步:主页面的设置
这里其实也没啥好说的,页面上三个不能输入的三个文本框,然后点击会弹出东西来。
//宏定义
#define ylsrect(x, y, w, h) cgrectmake([uiscreen mainscreen].bounds.size.width * x, [uiscreen mainscreen].bounds.size.height * y, [uiscreen mainscreen].bounds.size.width * w, [uiscreen mainscreen].bounds.size.height * h)
@interface viewcontroller ()<uitextfielddelegate>
//声明
/** text1 */
@property (nonatomic,strong) uitextfield *text1;
/** text2 */
@property (nonatomic,strong) uitextfield *text2;
/** text3 */
@property (nonatomic,strong) uitextfield *text3;
@end
 - (void)viewdidload {
 [super viewdidload];
 self.title = @"picker";
 //placeholder数组
 nsarray *placeholderarr = @[@"picker onevlaue",@"picker twovlaue",@"picker threevlaue"];
 //循环添加文本框
 for (int i = 0; i < 3; i ++)
 {
  uitextfield *text = [[uitextfield alloc]initwithframe:ylsrect(100/375, (140 + i * 60)/667, 175/375, 30/667)];
  text.borderstyle = uitextborderstyleroundedrect;
  text.backgroundcolor = [uicolor lightgraycolor];
  text.tag = i + 1000;
  text.placeholder = placeholderarr[i];
  text.delegate = self;
  [self.view addsubview:text];
  if(text.tag == 1000)
  {
   self.text1 = text;
  }else if(text.tag == 1001)
  {
   self.text2 = text;
  }else
  {
   self.text3 = text;
  }
 }
}
很多像我这样的新手,对textfiled的代理都不是很清楚,像我这个点击文本框不进行编辑,然后还能弹出自定义view的事件应该在哪里实现呢,答案就是在
//点击文本框时触发的事件
- (bool)textfieldshouldbeginediting:(uitextfield *)textfield;
就这样,主页面算是勾画好了。接下来就是自定义view的部分了。
第二步:实现自定义view
1.创建类ylsopickerview
2.在.h文件中声明变量,一个是需要传入的数组,一个是弹出框的标题。还要声明两个方法:
@interface ylsopickerview : uiview
/** array */
@property (nonatomic,strong) nsarray *array;
/** title */
@property (nonatomic,strong) nsstring *title;
//快速创建
+(instancetype)pickerview;
//弹出
-(void)show;
@end
3.接下来的就是最主要的工作,就是.m文件的编写
宏定义
#define ylsrect(x, y, w, h) cgrectmake([uiscreen mainscreen].bounds.size.width * x, [uiscreen mainscreen].bounds.size.height * y, [uiscreen mainscreen].bounds.size.width * w, [uiscreen mainscreen].bounds.size.height * h)
#define ylsfont(f) [uifont systemfontofsize:[uiscreen mainscreen].bounds.size.width * f]
#define ylscoloralpha(r,g,b,a) [uicolor colorwithred:(r)/255.0 green:(g)/255.0 blue:(b)/255.0 alpha:(a)]
#define ylsmainbackcolor [uicolor colorwithred:240/255.0 green:239/255.0 blue:245/255.0 alpha:1]
#define bluecolor [uicolor colorwithred:0/255.0 green:122/255.0 blue:255/255.0 alpha:1]
#define clearcolor [uicolor clearcolor]
声明需要用到的控件,遵守响应的协议
@interface ylsopickerview()<uipickerviewdelegate,uipickerviewdatasource>
/** view */
@property (nonatomic,strong) uiview *topview;
/** button */
@property (nonatomic,strong) uibutton *donebtn;
/** pickerview */
@property (nonatomic,strong) uipickerview *pickerview;
/** 选择传回的值 */
@property (nonatomic,strong) nsstring *result;
@end
实现init方法和创建方法
//快速创建
+ (instancetype)pickerview
{
 return [[self alloc]init];
}
-(instancetype)initwithframe:(cgrect)frame
{
 self = [super initwithframe:ylsrect(0, 0, 1, 917/667)];
 if (self)
 {
  self.backgroundcolor = ylscoloralpha(0, 0, 0, 0.4);
 }
 return self;
}
这里呢我要说一下的是,为了达到在点击文本框从下弹出的一个动态效果,所以起初的时候我将整个view的长度设置成了一个屏幕的长度加上选择器的长度,在弹出方法中我将整个view上移着添加进屏幕。这样会有好看点效果
添加页面控件,设置样式位置等
-(void)layoutsubviews
{
 [super layoutsubviews];
 self.topview = [[uiview alloc]initwithframe:ylsrect(0, 667/667, 1, 250/667)];
 self.topview.backgroundcolor = [uicolor whitecolor];
 [self addsubview:self.topview];
 //为view上面的两个角做成圆角。不喜欢的可以注掉
 uibezierpath *maskpath = [uibezierpath bezierpathwithroundedrect:self.topview.bounds byroundingcorners:uirectcornertopleft | uirectcornertopright cornerradii:cgsizemake(5, 5)];
 cashapelayer *masklayer = [[cashapelayer alloc] init];
 masklayer.frame = self.topview.bounds;
 masklayer.path = maskpath.cgpath;
 self.topview.layer.mask = masklayer;
 self.donebtn = [uibutton buttonwithtype:uibuttontypecustom];
 [self.donebtn settitle:@"done" forstate:uicontrolstatenormal];
 [self.donebtn settitlecolor:[uicolor graycolor] forstate:uicontrolstatenormal];
 [self.donebtn setframe:ylsrect(320/375, 5/667, 50/375, 40/667)];
 [self.donebtn addtarget:self action:@selector(quit) forcontrolevents:uicontroleventtouchupinside];
 [self.topview addsubview:self.donebtn];
 uilabel *titlelb = [[uilabel alloc]initwithframe:ylsrect(100/375, 0, 175/375, 50/667)];
 titlelb.backgroundcolor = clearcolor;
 titlelb.textalignment = nstextalignmentcenter;
 titlelb.text = self.title;
 titlelb.font = ylsfont(20/375);
 [self.topview addsubview:titlelb];
 self.pickerview = [[uipickerview alloc]init];
 [self.pickerview setframe:ylsrect(0, 50/667, 1, 200/667)];
 [self.pickerview setbackgroundcolor:ylsmainbackcolor];
 [self.pickerview setdelegate:self];
 [self.pickerview setdatasource:self];
 [self.pickerview selectrow:0 incomponent:0 animated:yes];
 [self.topview addsubview:self.pickerview];
}
同样,在这里我把topview的左上和右上两个角设置成了圆角也就是为了好看点,其实没啥区别,用的时候可以根据自己的需求来注释掉啥的。
实现pickerview的协议方法
<uipickerviewdelegate,uipickerviewdatasource>
// 返回选择器有几列.
- (nsinteger)numberofcomponentsinpickerview:(uipickerview *)pickerview
{
 return 1;
}
// 返回每组有几行
- (nsinteger)pickerview:(uipickerview *)pickerview numberofrowsincomponent:(nsinteger)component
{
 return [self.array count];
}
#pragma mark - 代理
// 返回第component列第row行的内容(标题)
- (nsstring *)pickerview:(uipickerview *)pickerview titleforrow:(nsinteger)row forcomponent:(nsinteger)component
{
 return self.array[row];
}
// 选中第component第row的时候调用
- (void)pickerview:(uipickerview *)pickerview didselectrow:(nsinteger)row incomponent:(nsinteger)component
{
 self.result = self.array[row];
}
先现实show方法,然后实现点击按钮done的推出方法
//弹出
- (void)show
{
 [self showinview:[uiapplication sharedapplication].keywindow];
}
//添加弹出移除的动画效果
- (void)showinview:(uiview *)view
{
 // 浮现
 [uiview animatewithduration:0.5 animations:^{
  cgpoint point = self.center;
  point.y -= 250;
  self.center = point;
 } completion:^(bool finished) {
 }];
 [view addsubview:self];
}
-(void)quit
{
 [uiview animatewithduration:0.5 animations:^{
  self.alpha = 0;
  cgpoint point = self.center;
  point.y += 250;
  self.center = point;
 } completion:^(bool finished) {
  if (!self.result) {
   self.result = self.array[0];
  }
  nslog(@"%@",self.result);
  [[nsnotificationcenter defaultcenter]postnotificationname:@"value" object:self.result];
  [self removefromsuperview];
 }];
}
在这里呢,需要注意的是,假设你没有点击,没有滑动的话,self.result是空值,所以需要你判断下,若为空,传入数组第一个数据,不为空的话就直接传递了,另外我用的是通知传值,因为block传值我还没有去学习了解,所以这里就用上我会的一个通知传值,但是我有个小问题,希望看到的人回答下我,通知一般在什么时候移除比较好呢??
第三步:主页实现点击出现的方法,并且接收回传的值。
主页面引入头文件#import “ylsopickerview.h”
实现点击弹出的事件
#pragma mark - uitextfielddelegate
//点击文本框时触发的事件,唤起跳出视图
- (bool)textfieldshouldbeginediting:(uitextfield *)textfield
{
 if(textfield.tag == 1000)
 {
  ylsopickerview *picker = [[ylsopickerview alloc]init];
  picker.array = @[@"iphone4",@"iphone4s",@"iphone5",@"iphone5s",@"iphone5c",@"iphone6",@"iphone6plus",@"iphone6s",@"iphone6splus"];
  picker.title = @"pick number";
  [picker show];
 }
 return no;
}
在- (void)viewdidload方法中接收通知,实现通知方法
[[nsnotificationcenter defaultcenter]addobserver:self selector:@selector(getvalue:) name:@"value" object:nil];
-(void)getvalue:(nsnotification *)notification
{
 self.text1.text = notification.object;
}
这样一来,一个简单的挑选单个数据的自定义选择器就算是大功告成了,使用起来有些许不方法,大家如果使用的话可以自己修改修改,此外要是有什么好的改进方法,大家也可以教教我,一起学习学习
others
在另外两个文本框点击出现的选择器本质上还是与上面写的一样,只是第二个数有联动效果的,第一组数据滑动的时候,第二组数据也跟着换,那我在写的时候传入的数据是字典形式的,然后另外设置两个数组将字典里的数据接收了,当然,开始就传数组形式的数据也可以,只需要在协议方法里面修改响应的代码就可以了。其他没什么变化。
传值的时候
第三个文本框也同样与前两个本质上行没有啥区别,只是在上面多了一个随机按钮,随机按钮点击事件实现也挺简单的
self.ranbtn = [uibutton buttonwithtype:uibuttontypecustom];
 [self.ranbtn settitle:@"random" forstate:uicontrolstatenormal];
 [self.ranbtn settitlecolor:[uicolor graycolor] forstate:uicontrolstatenormal];
 [self.ranbtn setframe:ylsrect(5/375, 5/667, 100/375, 40/667)];
 [self.ranbtn addtarget:self action:@selector(random:) forcontrolevents:uicontroleventtouchupinside];
 [self.topview addsubview:self.ranbtn];
-(void)random:(uipickerview *)picker
{
 for (int i = 0; i < 3; i++)
 {
  // 取出第i列的行数
  nsinteger count = [self.array[i] count];
  int random = arc4random_uniform((u_int32_t)count);
  //不会触发代理的选中方法
  [self.pickerview selectrow:random incomponent:i animated:yes];
  //label数据刷新
  [self pickerview:picker didselectrow:random incomponent:i];
 }
}
以上所述是小编给大家介绍的ios中自定义简单弹出pickerview(demo),希望对大家有所帮助
如对本文有疑问,请在下面进行留言讨论,广大热心网友会与你互动!! 点击进行留言回复


网友评论