杠上皇室美男团,周岫,东宁县政府网
第一步 安装 nis 服务器
[root@s ~]# yum install ypserv yp-tools rpcbind
这样就安装完成了,是不是很 easy
我这里的环境是:
nis 服务器 ip: 192.168.100.254 主机名: www.e2fsck.org
nis 客户端 ip: 192.168.100.240 主机名: site.e2fsck.org
第二步 配置 nis 服务器
1. 增加 nisdomain
[root@s ~]# vi /etc/sysconfig/network</p>
<p>nisdomain=e2fsck #这里的名字要和 hostname 一样
2. 启动 nis 服务
[root@s ~]# service rpcbind start #如果是 centos 5 应该是 service portmap start</p>
<p>[root@s ~]# service ypserv start
3. 限制ip范围
[root@s ~]# vi /var/yp/securenets</p>
<p>255.255.255.255 127.0.0.1
255.255.255.0 192.168.100.0
4. 添加测试用户
[root@s ~]# useradd e2fsck</p>
<p>[root@s ~]# passwd e2fsck
5. 建立数据库
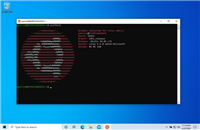
[root@s ~]# /usr/lib/yp/ypinit -m</p>
<p>
at this point, we have to construct a list of the hosts which will run nis
servers. www.e2fsck.org is in the list of nis server hosts. please continue to add
the names for the other hosts, one per line. when you are done with the
list, type a .
next host to add: www.e2fsck.org
next host to add: <span id="comm">这里 ctrl + d 这里从服务器的地址,我们这里不用</span>
the current list of nis servers looks like this:
www.e2fsck.org
is this correct? [y/n: y] <span id="comm">y</span>
we need a few minutes to build the databases...
building /var/yp/e2fsck/ypservers...
running /var/yp/makefile...
gmake[1]: entering directory `/var/yp/e2fsck'
updating passwd.byname...
updating passwd.byuid...
updating group.byname...
updating group.bygid...
updating hosts.byname...
updating hosts.byaddr...
updating rpc.byname...
updating rpc.bynumber...
updating services.byname...
updating services.byservicename...
updating netid.byname...
updating protocols.bynumber...
updating protocols.byname...
updating mail.aliases...
gmake[1]: leaving directory `/var/yp/e2fsck'
www.e2fsck.org has been set up as a nis master server.
now you can run ypinit -s www.e2fsck.org on all slave server.
6. 启动
[root@s ~]# service yppasswdd start
第三步 客户端配置
1. 下载安装包
[root@c2 ~]# yum install ypbind rpcbind
2. 图形方式认证
[root@c2 ~]# authconfig-tui</p>
<p>
authconfig-tui - (c) 1999-2005 red hat, inc.
┌───────┤ authentication configuration ├────—───|
│ user information authentication │
│ [ ] cache information [*] use md5 passwords │
│ [ ] use hesiod [*] use shadow passwords │
│ [ ] use ldap [ ] use ldap authentication │
│ [*] use nis [ ] use kerberos │
│ [ ] use winbind [ ] use smb authentication │
│ [ ] use winbind authentication │
│ [ ] local authorization is sufficient │
│ │
│ │ cancel │ │ next │ │
│
│ │
└─────────────────────────────────
这里选择 use nis 然后下一步,domain写 e2fsck ;server 写ip 192.168.100.254 即可。
3. ssh测试
ssh 连接 192.168.100.240 用上面创建的 e2fsck 帐号查看是否登录。
login as: e2fsck
e2fsck@www.e2fsck.org’s password:
could not chdir to home directory /home/e2fsck: no such file or directory
-bash-3.2$
如对本文有疑问,请在下面进行留言讨论,广大热心网友会与你互动!!
点击进行留言回复
相关文章:
-
-
-
-
-
-
-
-
-
-
处理器及其调度
处理器及其调度 1. 处理器 用于执行指令对数据进行加工处理。 具有的机制: 寄存器:寄存器有多种,主要的作用是构成处理器的工作现场 指令系统 非特权指...
[阅读全文]
-


网友评论