网站宕机,android开发视频教程,ippotv
着上一篇 aspnetcore容器化(docker)部署(一) —— 入门,在单个容器helloworld的基础上引入nginx反向代理服务器组成多容器应用。
配置转接头。详见:
startup.cs
public void configure(iapplicationbuilder app, ihostingenvironment env)
{
    if (env.isdevelopment())
    {
        app.usedeveloperexceptionpage();
    }
    else
    {
        app.useexceptionhandler("/home/error");
    }
    app.useforwardedheaders(new forwardedheadersoptions
    {
        forwardedheaders = forwardedheaders.xforwardedfor | forwardedheaders.xforwardedproto
    });

    app.usestaticfiles();
    app.usecookiepolicy();

    app.usemvc(routes =>
    {
        routes.maproute(
            name: "default",
            template: "{controller=home}/{action=index}/{id?}");
    });
}
重新构建helloworld镜像并生成容器
ps c:\users\administrator> docker images
repository                             tag                 image id            created             size
helloworld                             v1.1                a57e147d8487        about an hour ago   265mb
mcr.microsoft.com/dotnet/core/sdk      2.2-stretch         e4747ec2aaff        2 weeks ago         1.74gb
mcr.microsoft.com/dotnet/core/aspnet   2.2-stretch-slim    f6d51449c477        2 weeks ago         260mb
docker4w/nsenter-dockerd               latest              2f1c802f322f        7 months ago        187kb
ps c:\users\administrator> docker ps -a
container id        image               command                  created             status              ports                                      names
c8ec48808318        helloworld:v1.1     "dotnet helloworld.d…"   about an hour ago   up 12 minutes       0.0.0.0:81->80/tcp                         netcore_helloworld
nginx官方镜像和构建教程
1.创建一个nginx配置文件
helloworld.conf
server {
  listen 801; #监听801端口

  location / {
    proxy_pass http://netcore_helloworld:80; #默认80端口可不加端口号,这里转发没有使用ip而是containerid
  }
}
2.自定义nginx镜像的dockerfile
#定义基础镜像 nginx:latest
from nginx
#复制自定义的配置文件到nginx配置文件目录下
copy helloworld.conf /etc/nginx/conf.d/helloworld.conf
#暴露80端口到外部
expose 80
#容器运行参数
cmd ["nginx", "-g", "daemon off;"]
3.构建mynginx镜像
ps c:\users\administrator> cd c:\users\administrator\source\repos\aspnetcore_docker\mynginx
ps c:\users\administrator\source\repos\aspnetcore_docker\mynginx> docker build -t mynginx:v1.0 .
sending build context to docker daemon  3.072kb
step 1/4 : from nginx
 ---> 62c261073ecf
step 2/4 : copy helloworld.conf /etc/nginx/conf.d/helloworld.conf
 ---> 0514a786be49
step 3/4 : expose 80
 ---> running in 0693d4c225ef
removing intermediate container 0693d4c225ef
 ---> 7546051297e3
step 4/4 : cmd ["nginx", "-g", "daemon off;"]
 ---> running in 7f7634a0d689
removing intermediate container 7f7634a0d689
 ---> 4b260c730139
successfully built 4b260c730139
successfully tagged mynginx:v1.0
security warning: you are building a docker image from windows against a non-windows docker host. all files and directories added to build context will have '-rwxr-xr-x' permissions. it is recommended to double check and reset permissions for sensitive files and directories.
ps c:\users\administrator\source\repos\aspnetcore_docker\mynginx> docker images
repository                             tag                 image id            created             size
mynginx                                v1.0                f554133b97ee        9 seconds ago       109mb
helloworld                             v1.1                a57e147d8487        about an hour ago   265mb
nginx                                  latest              62c261073ecf        5 days ago          109mb
mcr.microsoft.com/dotnet/core/sdk      2.2-stretch         e4747ec2aaff        2 weeks ago         1.74gb
mcr.microsoft.com/dotnet/core/aspnet   2.2-stretch-slim    f6d51449c477        2 weeks ago         260mb
docker4w/nsenter-dockerd               latest              2f1c802f322f        7 months ago        187kb
4.创建nginx容器
容器内80和801端口分别映射到外部(宿主机)的80和801端口,-p 外部端口:内部端口
ps c:\users\administrator> docker run --name mynginx -d -p 801:801 -p 80:80 f554133b97ee
1b2751b1dba6bb4b97f8c78cda8646709ea80da03e5136025cf52dc3a3cc740d
ps c:\users\administrator> docker ps -a
container id        image               command                  created             status              ports                                      names
dae033fe1b5c        f554133b97ee        "nginx -g 'daemon of…"   18 seconds ago      up 17 seconds       0.0.0.0:80->80/tcp, 0.0.0.0:801->801/tcp   mynginx
c8ec48808318        helloworld:v1.1     "dotnet helloworld.d…"   8 minutes ago       up 8 minutes        0.0.0.0:81->80/tcp                         netcore_helloworld
5.验证nginx

80端口访问正常
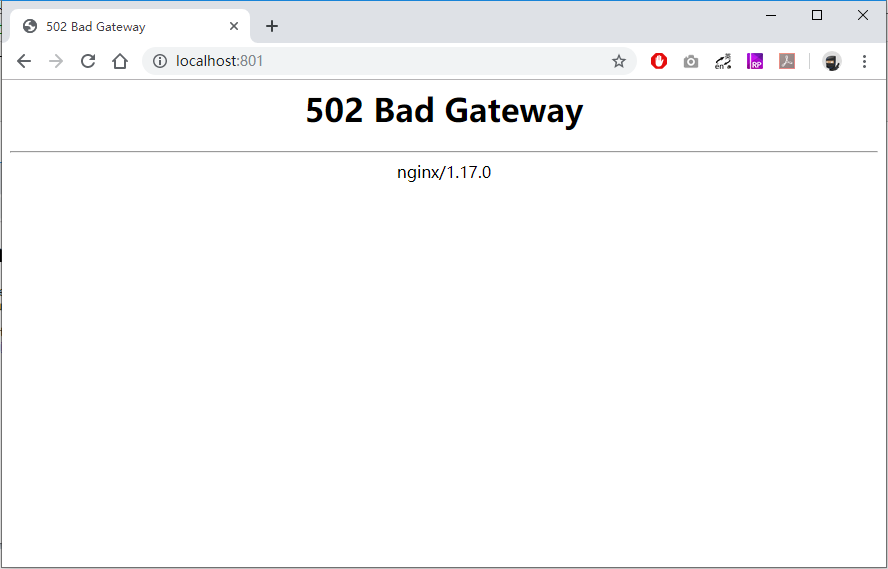
801端口转发失败,应该说是无法识别http://netcore_helloworld这个地址,因为容器之间是相互隔离的。
所以需要使用bridge networks创建一个桥接网络将多个容器(网络)连接起来进行通信。
另外,使用link的方式进行ip映射也可以达到容器间通信的效果,跟windows里面修改hosts文件ip映射hostname类似,需要注意的是link这个(废弃)已过时的特性会在将来的版本中移除,不推荐使用。
官方介绍
1.创建一个network
docker network create [options] network
ps c:\users\administrator> docker network create mybridge
475a135ea2524de25f5594e35f2640e39c22365336092dc34f17e1019252eab1
ps c:\users\administrator> docker network ls
network id          name                driver              scope
d1110fd56b8c        bridge              bridge              local
194bf7b8bfea        mybridge            bridge              local
c8ddf53079b8        host                host                local
522c9e7cfbcb        none                null                local
2.将容器加入到network
docker network connect [options] network container
加入之后需要重启容器,或者在创建容器时就指定docker run --network=bridgename ....
ps c:\users\administrator> docker network connect mybridge dae033fe1b5c
ps c:\users\administrator> docker network connect mybridge c8ec48808318
ps c:\users\administrator> docker restart dae033fe1b5c c8ec48808318
dae033fe1b5c
c8ec48808318
查看mybridge的information
ps c:\users\administrator> docker inspect 194bf7b8bfea
[
    {
        "name": "mybridge",
        "id": "194bf7b8bfeafdbfb8842c0d6252962c8cb1367c60d8742c5830c4446b571198",
        "created": "2019-05-21t06:07:35.1683249z",
        "scope": "local",
        "driver": "bridge",
        "enableipv6": false,
        "ipam": {
            "driver": "default",
            "options": {},
            "config": [
                {
                    "subnet": "172.18.0.0/16",
                    "gateway": "172.18.0.1"
                }
            ]
        },
        "internal": false,
        "attachable": false,
        "ingress": false,
        "configfrom": {
            "network": ""
        },
        "configonly": false,
        "containers": {
            "c8ec488083184ff419cb1a2b1b67fb92520db276263ee43e97c3f30aa58314d0": {
                "name": "netcore_helloworld",
                "endpointid": "a21a766a83887b1c5ce44b75affb2bce78433ad307b8a5fa0f991969492ace4c",
                "macaddress": "02:42:ac:12:00:04",
                "ipv4address": "172.18.0.4/16",
                "ipv6address": ""
            },
            "dae033fe1b5c79c2604df3facb4c714a56e49f3501c34bda125a786b28faef88": {
                "name": "mynginx",
                "endpointid": "4119532667d868d735c15f584e6e7e27d48308808ef8b58e4d85a8b3e626791a",
                "macaddress": "02:42:ac:12:00:03",
                "ipv4address": "172.18.0.3/16",
                "ipv6address": ""
            }
        },
        "options": {},
        "labels": {}
    }
]
3.验证


示例代码github地址:https://github.com/wwwu/aspnetcore_docker
如对本文有疑问,请在下面进行留言讨论,广大热心网友会与你互动!! 点击进行留言回复

Blazor server side 自家的一些开源的, 实用型项目的进度之 CEF客户端

.NET IoC模式依赖反转(DIP)、控制反转(Ioc)、依赖注入(DI)


vue+.netcore可支持业务代码扩展的开发框架 VOL.Vue 2.0版本发布


网友评论