不负如来不负卿下载,shapp.dll,绝世游戏txt下载
本文实例讲述了codeigniter框架实现的整合smarty引擎。分享给大家供大家参考,具体如下:
smarty的模板机制很强大,一般情况下ci框架无需整合其他模板标签,因为php本身就是一种标签,简单易用。codeigniter整合smarty教程(我用的都是最新版本)如下:
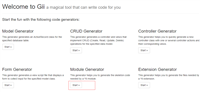
第一步:下载codeigniter最新版本:codeigniter框架源码
第二步:下载smarty最新版本:smarty引擎源码
第三步:具体配置
我已将本人整合好的代码上传,有兴趣的可以下载阅读。。
1、准备
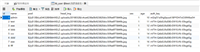
将smarty拷贝到application/libraries下,然后再根目录下下新建templates,templates_c,config,cache目录,结构如下:

2、修改入口文件
在入口文件index.php中新增:
define('root', dirname(__file__));
3、新建ci_smarty.php
在libraries文件下新建ci_smarty.php,写如下代码:
<?php
/**
* =======================================
* created by pk technology.
* author: zhihua_w
* date: 2016/10/31 0031
* time: 上午 9:16
* project: ci整合
* power: ci框架整合smarty
* =======================================
*/
defined('basepath') or exit('no direct script access allowed');
require(apppath . 'libraries/smarty/smarty.class.php');
class ci_smarty extends smarty
{
    public function __construct($template_dir = '', $compile_dir = '', $config_dir = '', $cache_dir = '')
    {
      parent::__construct();
      if (is_array($template_dir)) {
        foreach ($template_dir as $key => $value) {
          $this->$key = $value;
        }
      } else {
        //root是codeigniter在入口文件index.php定义的本web应用的根目录
        $this->template_dir = $template_dir ? $template_dir : root . '/templates';
        $this->compile_dir = $compile_dir ? $compile_dir : root . '/templates_c';
        $this->config_dir = $config_dir ? $config_dir : root . '/config';
        $this->cache_dir = $cache_dir ? $cache_dir : root . '/cache';
      }
    }
}
4、在controller中使用
在控制器welcome.php中写入使用方法,代码如下:
<?php
defined('basepath') or exit('no direct script access allowed');
class welcome extends ci_controller
{
    /**
     * welcome constructor.
     * 写入构造函数,引入ci_smarty类文件
     */
    public function __construct()
    {
      parent::__construct();
      $this->load->library('ci_smarty');
    }
    /**
     * smarty测试函数
     */
    public function test()
    {
      $this->ci_smarty->assign('test', 'smarty');
      $this->ci_smarty->display('test.tpl');
    }
}
5、创建模版试图
在templates文件夹下创建test.tpl文件,写入如下代码:
<!doctype html>
<html lang="en">
<head>
  <meta charset="utf-8">
  <title>codeigniter整合smarty测试</title>
</head>
<body>
这是 {$test} 测试
</body>
</html>
6、访问
至此,我们整合完毕,访问:http://localhost/codeigniter_smarty/index.php/welcome/test即可看到测试结果。
更多关于codeigniter相关内容感兴趣的读者可查看本站专题:《codeigniter入门教程》、《ci(codeigniter)框架进阶教程》、《php优秀开发框架总结》、《thinkphp入门教程》、《thinkphp常用方法总结》、《zend framework框架入门教程》、《php面向对象程序设计入门教程》、《php+mysql数据库操作入门教程》及《php常见数据库操作技巧汇总》
希望本文所述对大家基于codeigniter框架的php程序设计有所帮助。
如对本文有疑问,请在下面进行留言讨论,广大热心网友会与你互动!! 点击进行留言回复

YII2框架中使用RBAC对模块,控制器,方法的权限控制及规则的使用示例
YII2框架中ActiveDataProvider与GridView的配合使用操作示例
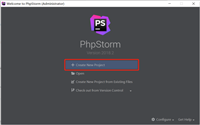
PhpStorm的使用教程(本地运行PHP+远程开发+快捷键)
网友评论