适合婚礼上唱的歌,音效增幅器,造梦西游1无敌版
先看下官网的介绍:
==thymeleaf是适用于web和独立环境的现代服务器端java模板引擎。
thymeleaf的主要目标是为您的开发工作流程带来优雅的自然模板 -html可以在浏览器中正确显示,也可以作为静态原型工作,从而可以在开发团队中加强协作。
thymeleaf拥有适用于spring framework的模块,与您喜欢的工具的大量集成以及插入您自己的功能的能力,对于现代html5 jvm web开发而言,thymeleaf是理想的选择。==
在springboot中,springboot对thymeleaf提供了良好的支持,同时也提供了自动化配置,因此在springboot中使用thymeleaf非常快捷方便。
创建方法建议使用idea快速创建springboot项目,并选择web、thymeleaf依赖:

创建完成后,idea自动在pom中加入了web和thymeleaf依赖管理,pom.xml:
    <dependencies>
        <dependency>
            <groupid>org.springframework.boot</groupid>
            <artifactid>spring-boot-starter-thymeleaf</artifactid>
        </dependency>
        <dependency>
            <groupid>org.springframework.boot</groupid>
            <artifactid>spring-boot-starter-web</artifactid>
        </dependency>

        <dependency>
            <groupid>org.springframework.boot</groupid>
            <artifactid>spring-boot-starter-test</artifactid>
            <scope>test</scope>
        </dependency>
    </dependencies>
项目架构:

springboot为thymeleaf提供了自动化配置类thymeleafautoconfiguration,源码:
@configuration
@enableconfigurationproperties({thymeleafproperties.class})
@conditionalonclass({templatemode.class, springtemplateengine.class})
@autoconfigureafter({webmvcautoconfiguration.class, webfluxautoconfiguration.class})
public class thymeleafautoconfiguration {...}
可以看出相关的配置信息是从thymeleafproperties类中获得的,进一步查看thymeleafproperties的源码:
@configurationproperties(
    prefix = "spring.thymeleaf"
)
public class thymeleafproperties {
    private static final charset default_encoding;
    public static final string default_prefix = "classpath:/templates/";
    public static final string default_suffix = ".html";
    private boolean checktemplate = true;
    private boolean checktemplatelocation = true;
    private string prefix = "classpath:/templates/";
    private string suffix = ".html";
    private string mode = "html";
    //省略
}
从该配置可以看出默认的thymeleaf存放位置是classpath:/templates/,即resources/templates/下,刚刚我们使用idea创建项目时,已经自动生成了该目录。
我们如果需要对thymeleaf的配置进行更改,可直接在application.properties中配置:
#是否开启缓存,默认为true
spring.thymeleaf.cache=false
#检查模板文件是否存在
spring.thymeleaf.check-template=true
#检查模本目录是否存在
spring.thymeleaf.check-template-location=true
#模板文件编码
spring.thymeleaf.encoding=utf-8
#模板位置
spring.thymeleaf.prefix=classpath:/templates/
#模板文件后缀名
spring.thymeleaf.suffix=.html
#content-type
spring.thymeleaf.servlet.content-type=text/html
1、新建user和usercontroller:
user.java:
package com.gongsir.springboot02.pojo;

public class user {
    private string name;
    private string major;
    private string grade;

    public string getname() {
        return name;
    }

    public void setname(string name) {
        this.name = name;
    }

    public string getmajor() {
        return major;
    }

    public void setmajor(string major) {
        this.major = major;
    }

    public string getgrade() {
        return grade;
    }

    public void setgrade(string grade) {
        this.grade = grade;
    }
}
usercontroller.java:
@controller
public class usercontroller {
    @getmapping(path = "/users")
    public modelandview getusers(){
        list<user> list = new arraylist<>();
        user u1 = new user();
        u1.setname("龚涛");
        u1.setmajor("计算机");
        u1.setgrade("2017");
        list.add(u1);
        user u2 = new user();
        u2.setname("李诗雅");
        u2.setmajor("网络工程");
        u2.setgrade("2017");
        list.add(u2);
        //视图模板文件的名字,需在template目录下创建同名模板文件
        modelandview mv = new modelandview("users");
        mv.addobject("users",list);
        return mv;
    }
}
2、在模板目录下新建users.html模板文件,显示数据:
<!doctype html>
<html lang="en" xmlns:th="http://www.thymeleaf.org">
<head>
    <meta charset="utf-8">
    <title>用户列表</title>
</head>
<body>
    <table border="1px sold black">
        <tr>
            <td>姓名</td>
            <td>专业</td>
            <td>年级</td>
        </tr>
        <tr th:each="user:${users}">
            <td th:text="${user.name}"></td>
            <td th:text="${user.major}"></td>
            <td th:text="${user.grade}"></td>
        </tr>
    </table>
</body>
</html>
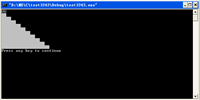
3、启动项目,访问,如图:

本文主要介绍springboot整合thymeleaf视图技术,并给了一个简单demo演示,想学习更多thymeleaf知识?看官网吧:.
不过当前流行前后端分离技术,大多数开发不需要在后端整合视图技术,后端只需要提供接口即可,待续.....
如对本文有疑问,请在下面进行留言讨论,广大热心网友会与你互动!! 点击进行留言回复
如何在没有core文件的情况下用dmesg+addr2line定位段错误
用QT制作3D点云显示器——QtDataVisualization
网友评论